Get started
The Mermaid Chart team is excited to introduce a Visual Editor for flowcharts, enabling users of all skill levels to create diagrams easily and efficiently, with both GUI and code-based editing options.
Read our blog post and watch a demo video .
About
Create flowchart nodes, connect them with edges, update shapes, change colors, and edit labels with just a few clicks that automatically reflect in your diagram’s code for easy customizability. Changes made in the Visual Editor will be reflected in the Code Editor and vice versa.
The Visual Editor is a great way to get started with Mermaid Chart as you can easily edit the design of your flowchart nodes, edges, labels, and more with just a few clicks.
This feature currently supports flowcharts. More diagrams will be supported in future feature iterations.
Demo
Some notes to start
Your code will be prettified
By using the Visual Editor, your code will be restructured as code is generated so that your code is kept as neat as possible with the latest syntax.
Using the Visual Editor will prettify your code. If you want to keep your code as is, use the Code Editor.
Diagrams currently supported
Flowcharts
This feature currently supports Flowcharts.
We will be adding subgraphs for Flowcharts and additional diagrams in future iterations of this feature.
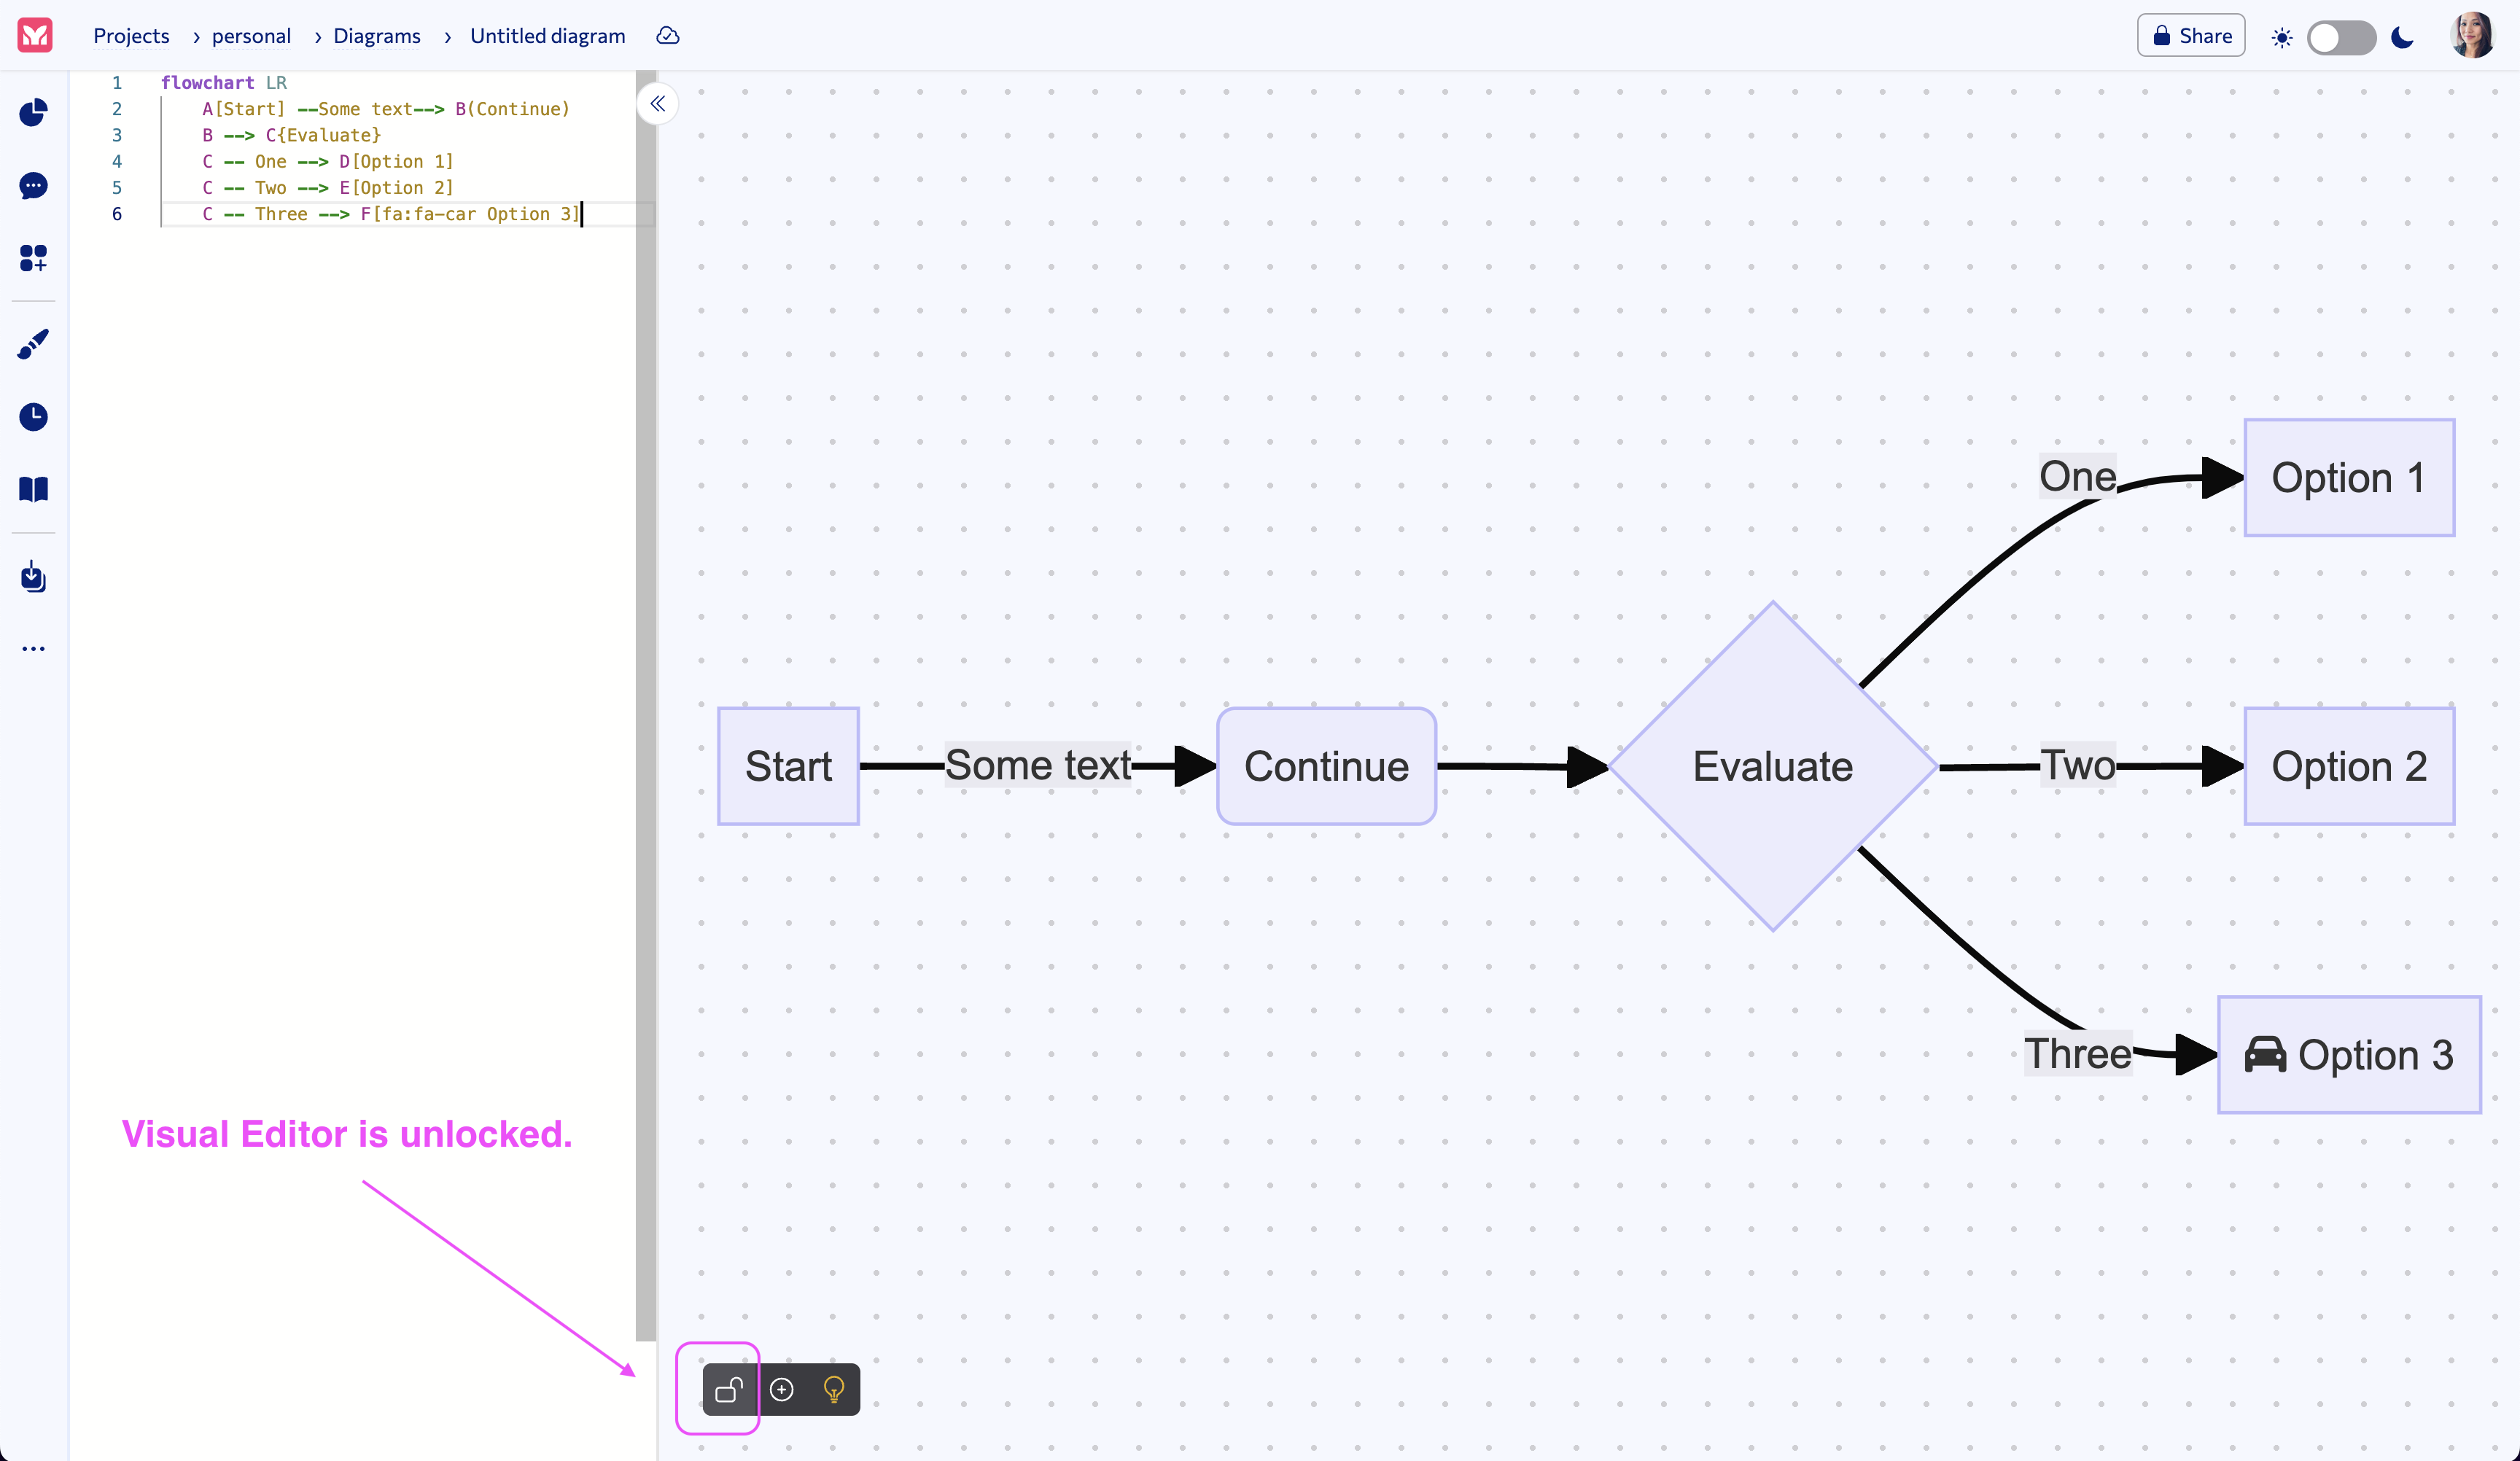
Enable/disable the Visual Editor
To enable the Visual Editor, click on the Lock icon (first icon) to unlock the feature.
To disable the Visual Editor, click on the Unlock icon (first icon) to lock the feature.
Once enabled, you can start using the Visual Editor to create and edit your flowcharts.
You will see a toast message when the Visual Editor is enabled to let you know that your code will be prettified. And the background color of the Visual Editor will change to a circle grid.
Screenshot for enabling/disabling the Visual Editor:
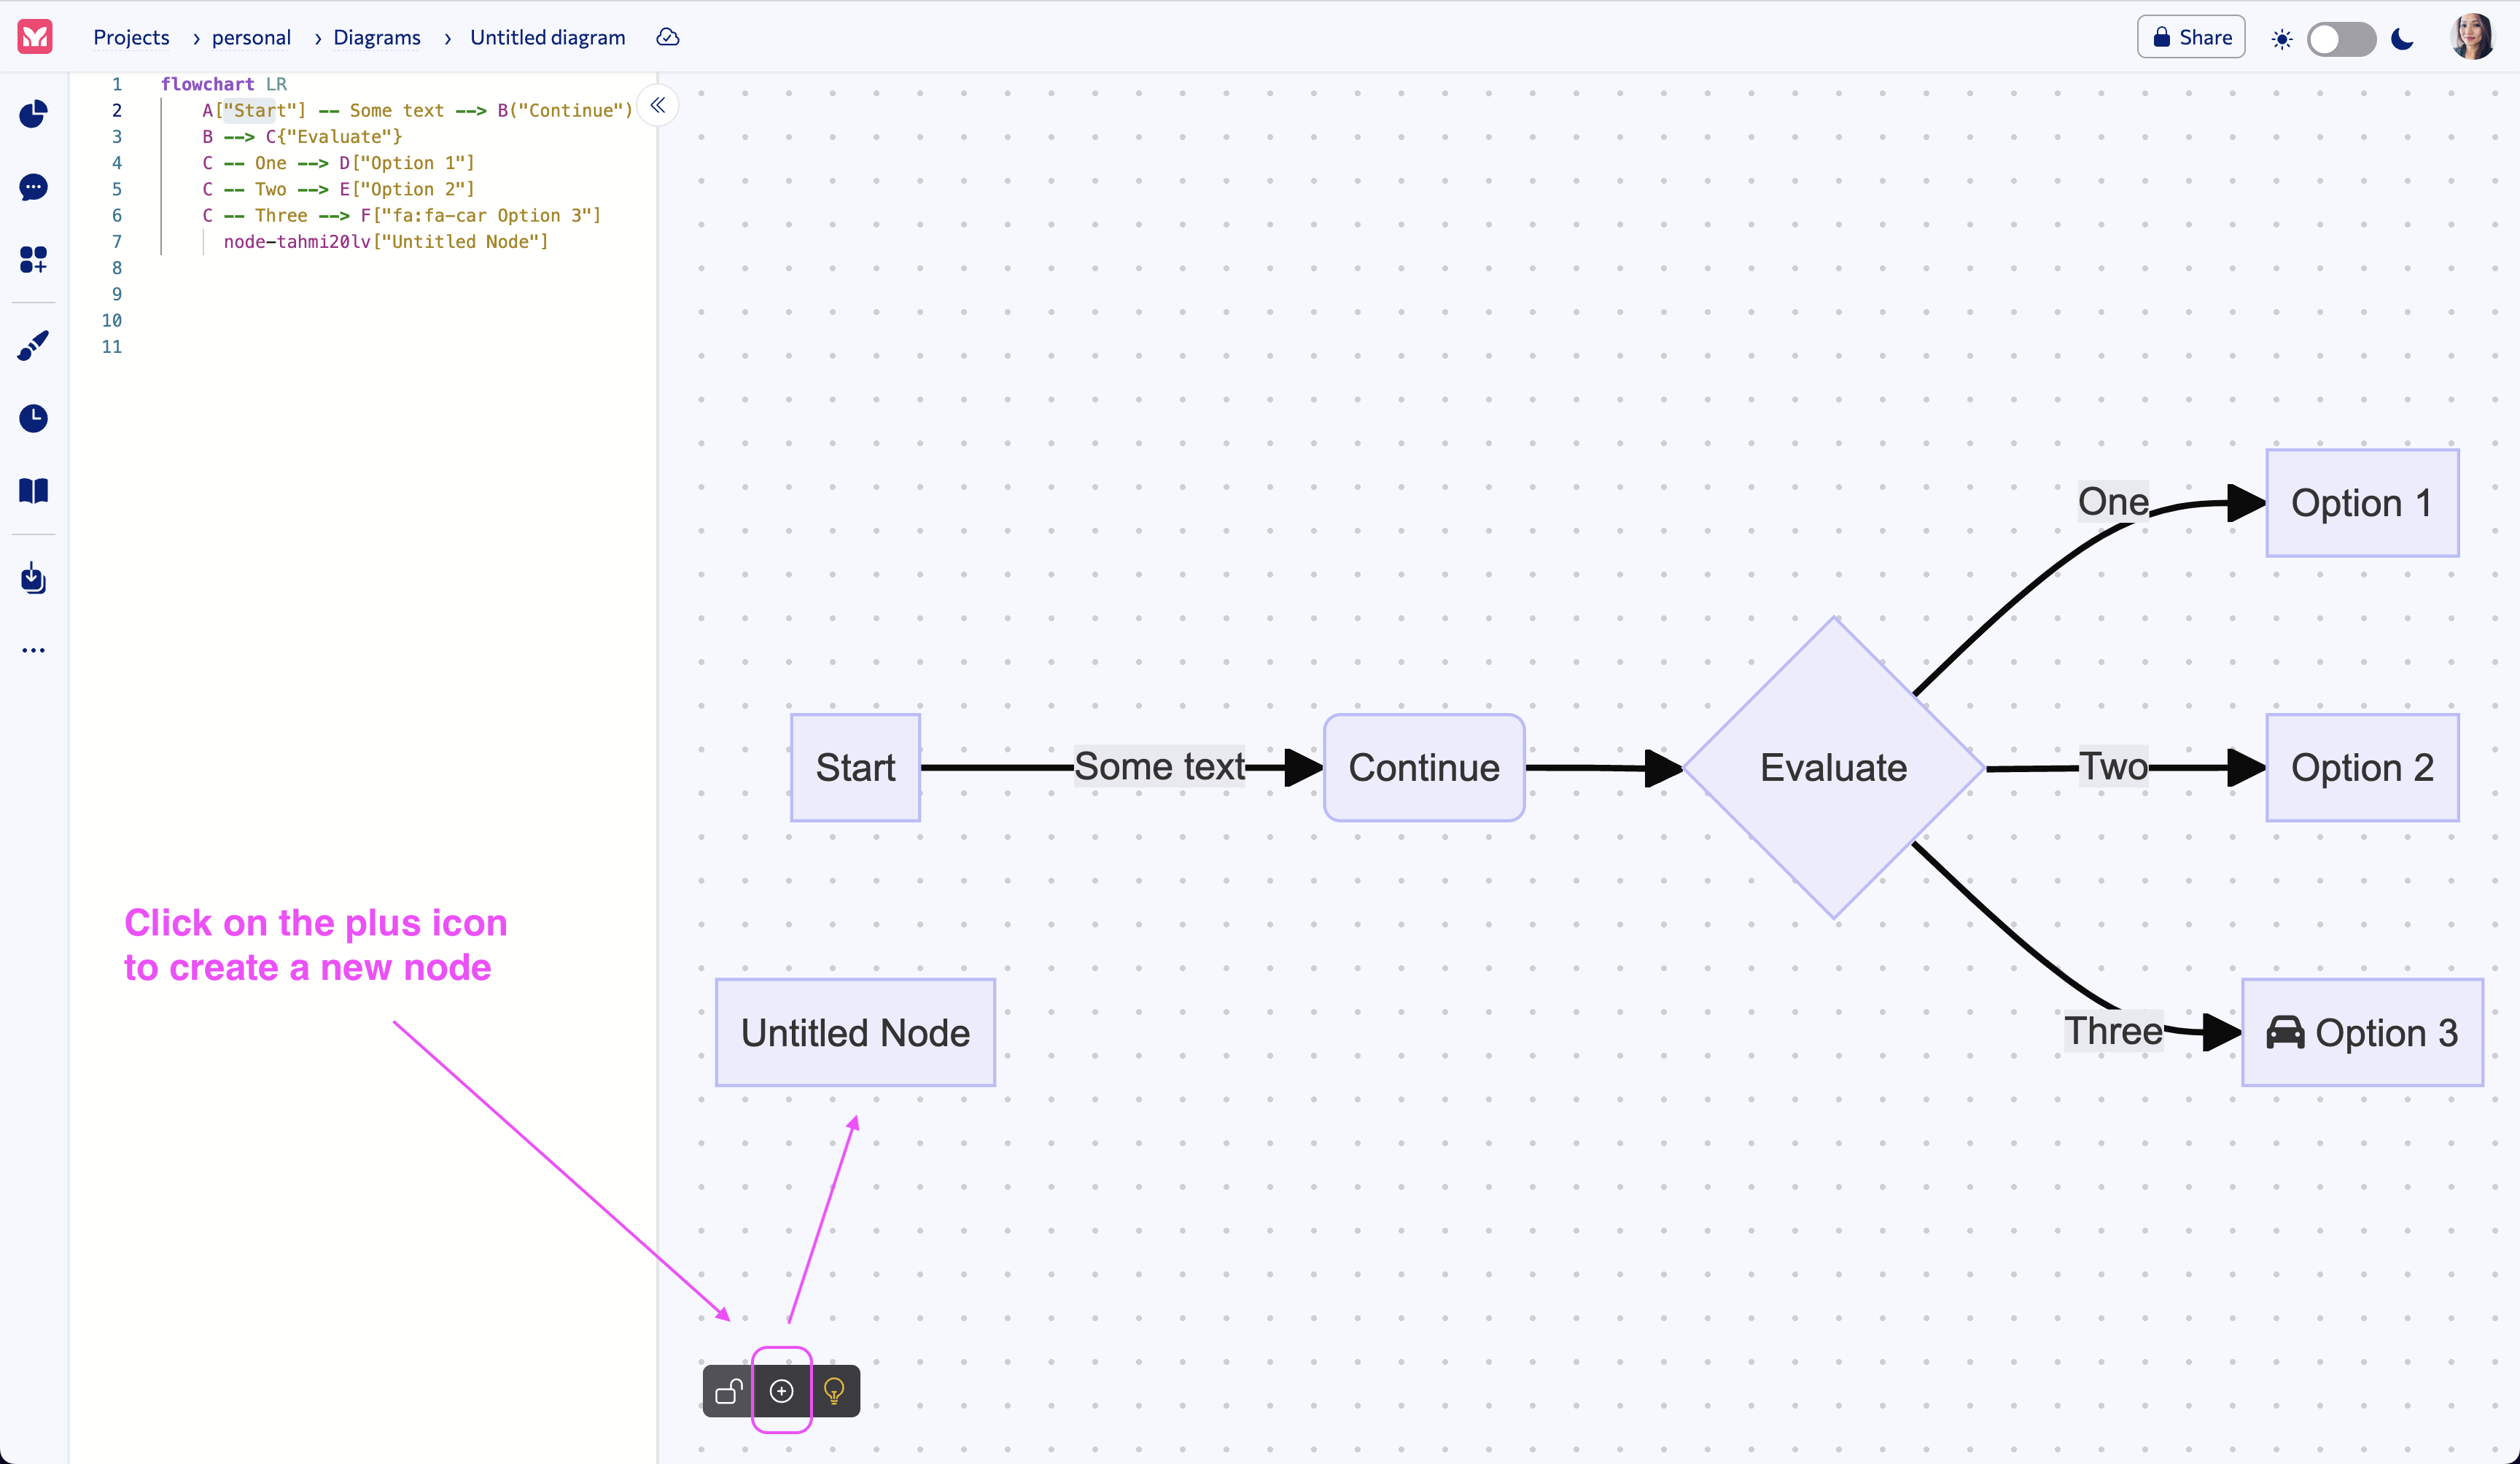
Add Node
To add a node, click on the “Plus” icon (middle icon) of the Visual Editor menu.
This will create a new node that you can connect to other nodes.
Screenshot for adding a node:
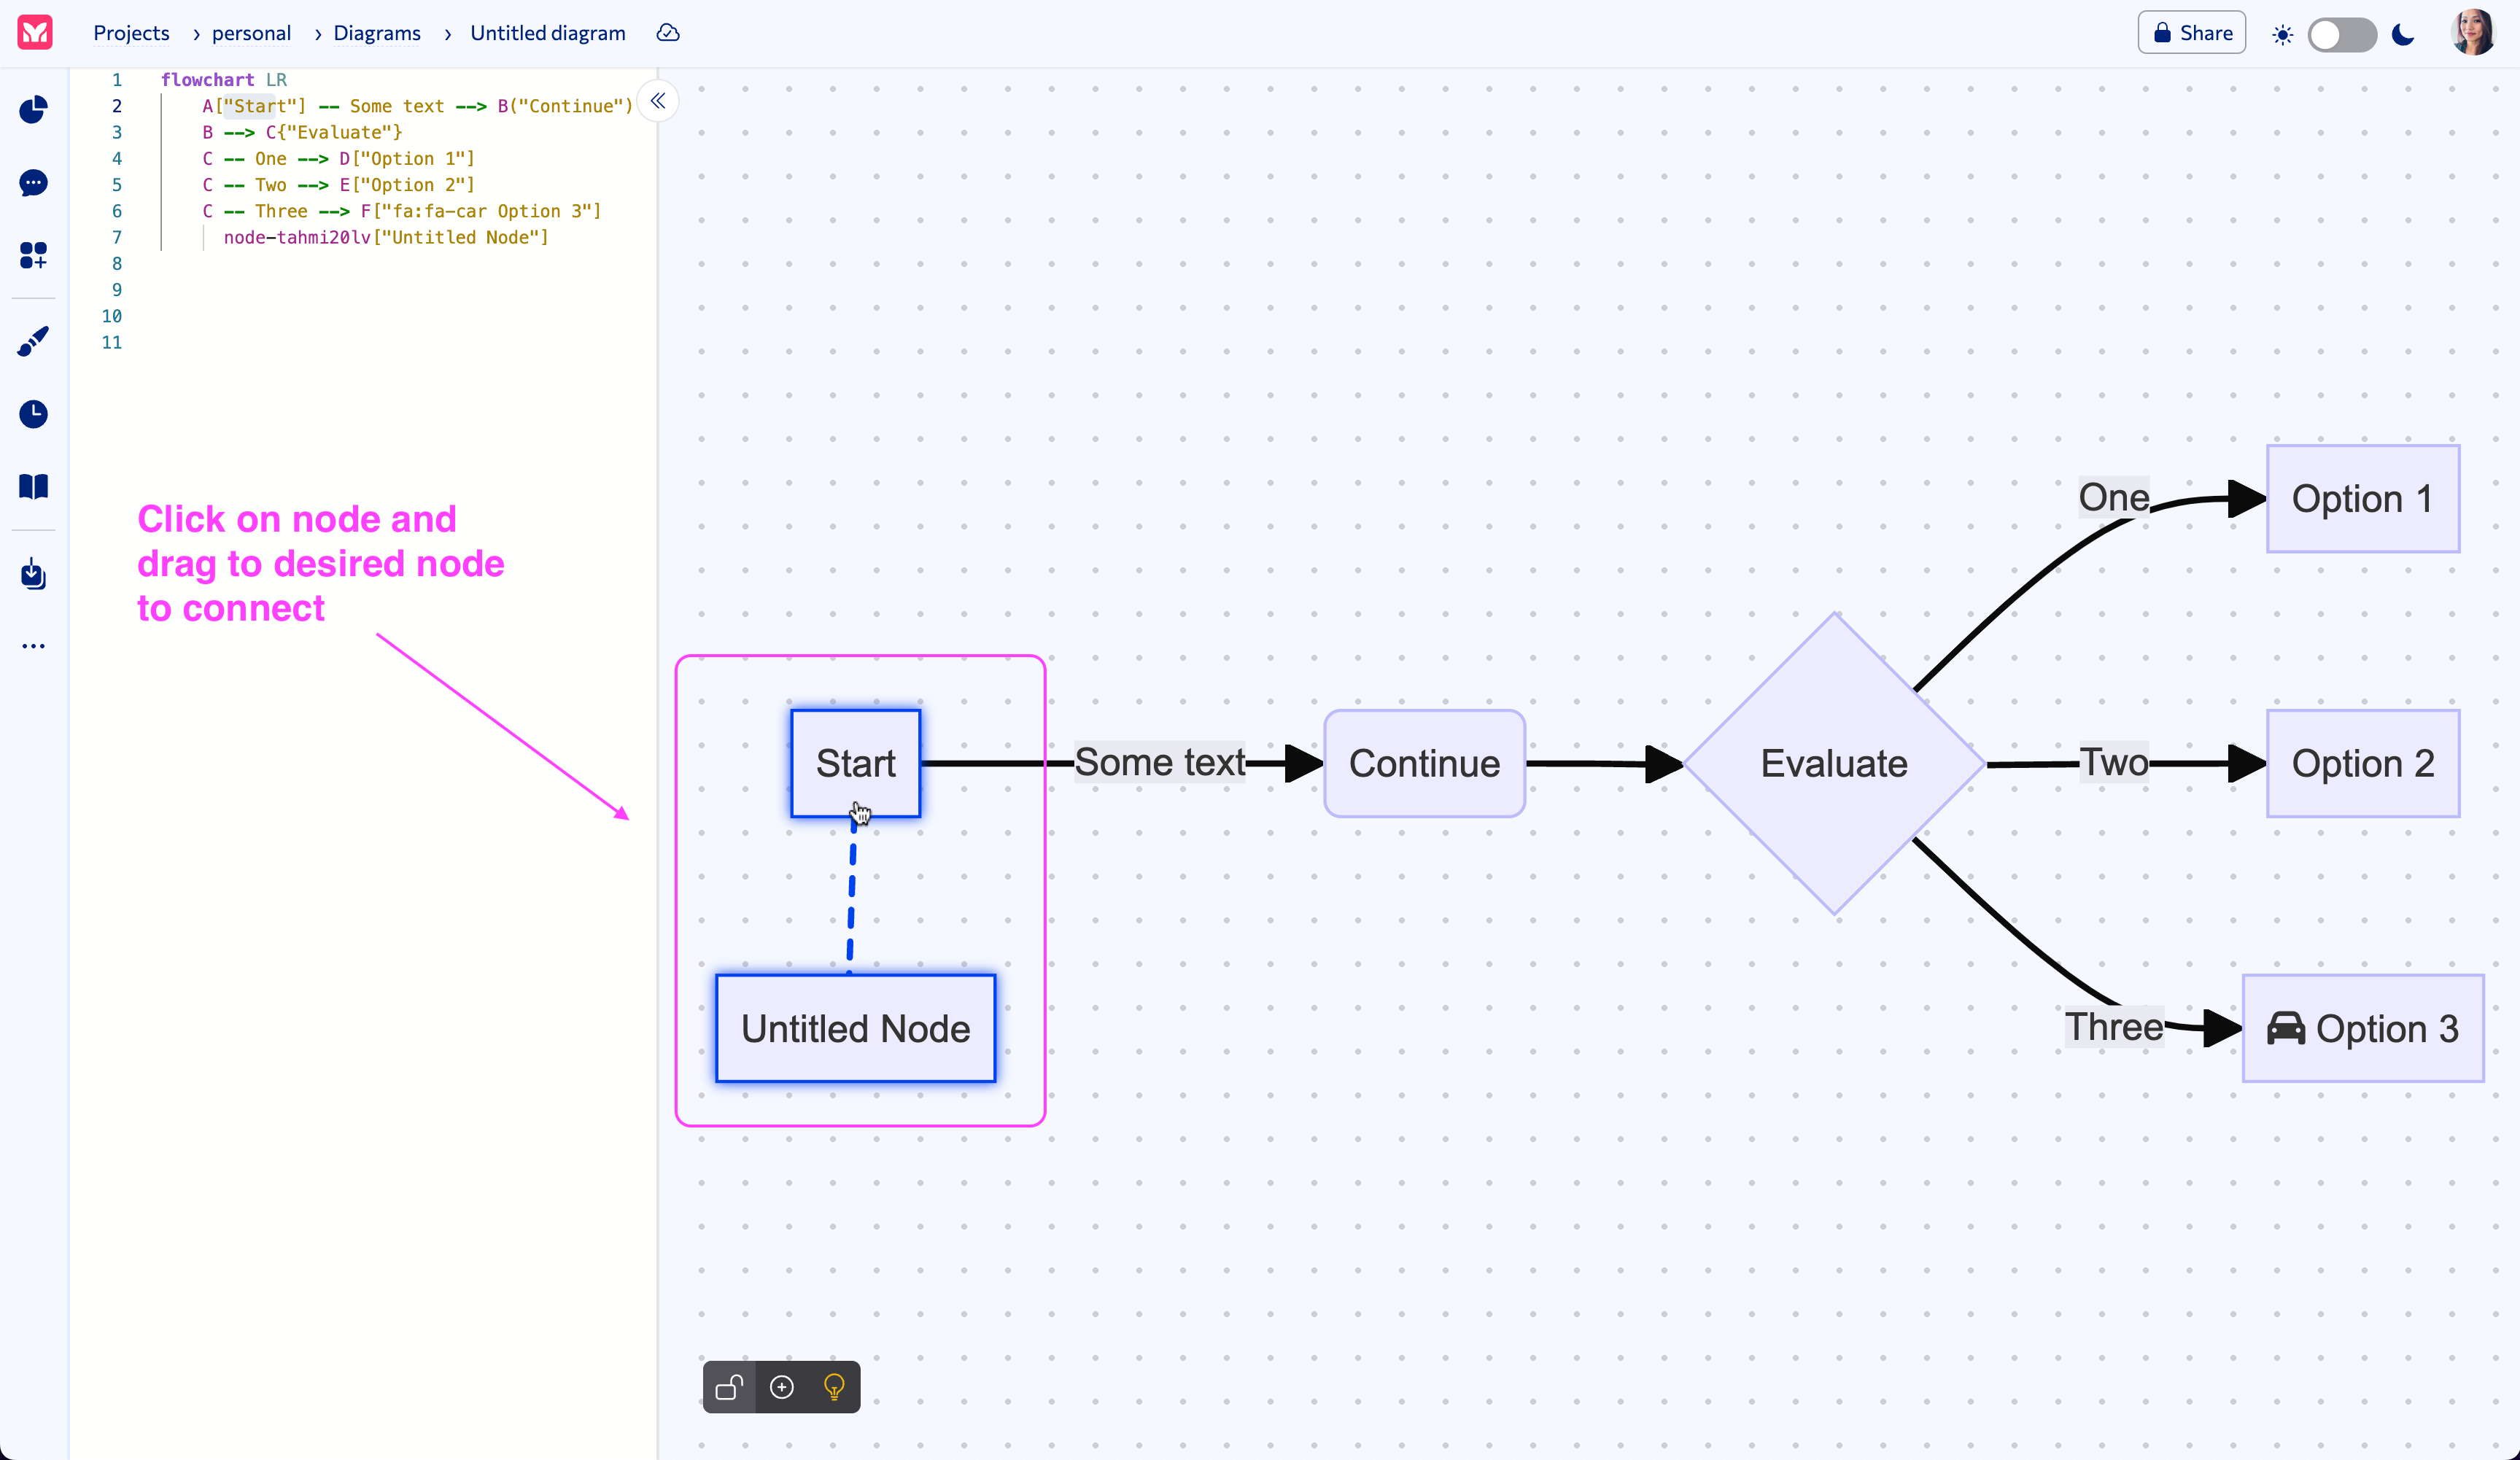
Connect Nodes
To connect nodes, click on a node and drag to another node.
Release your mouse to connect the nodes. This will create an edge between the two nodes.
Screenshot for connecting nodes:
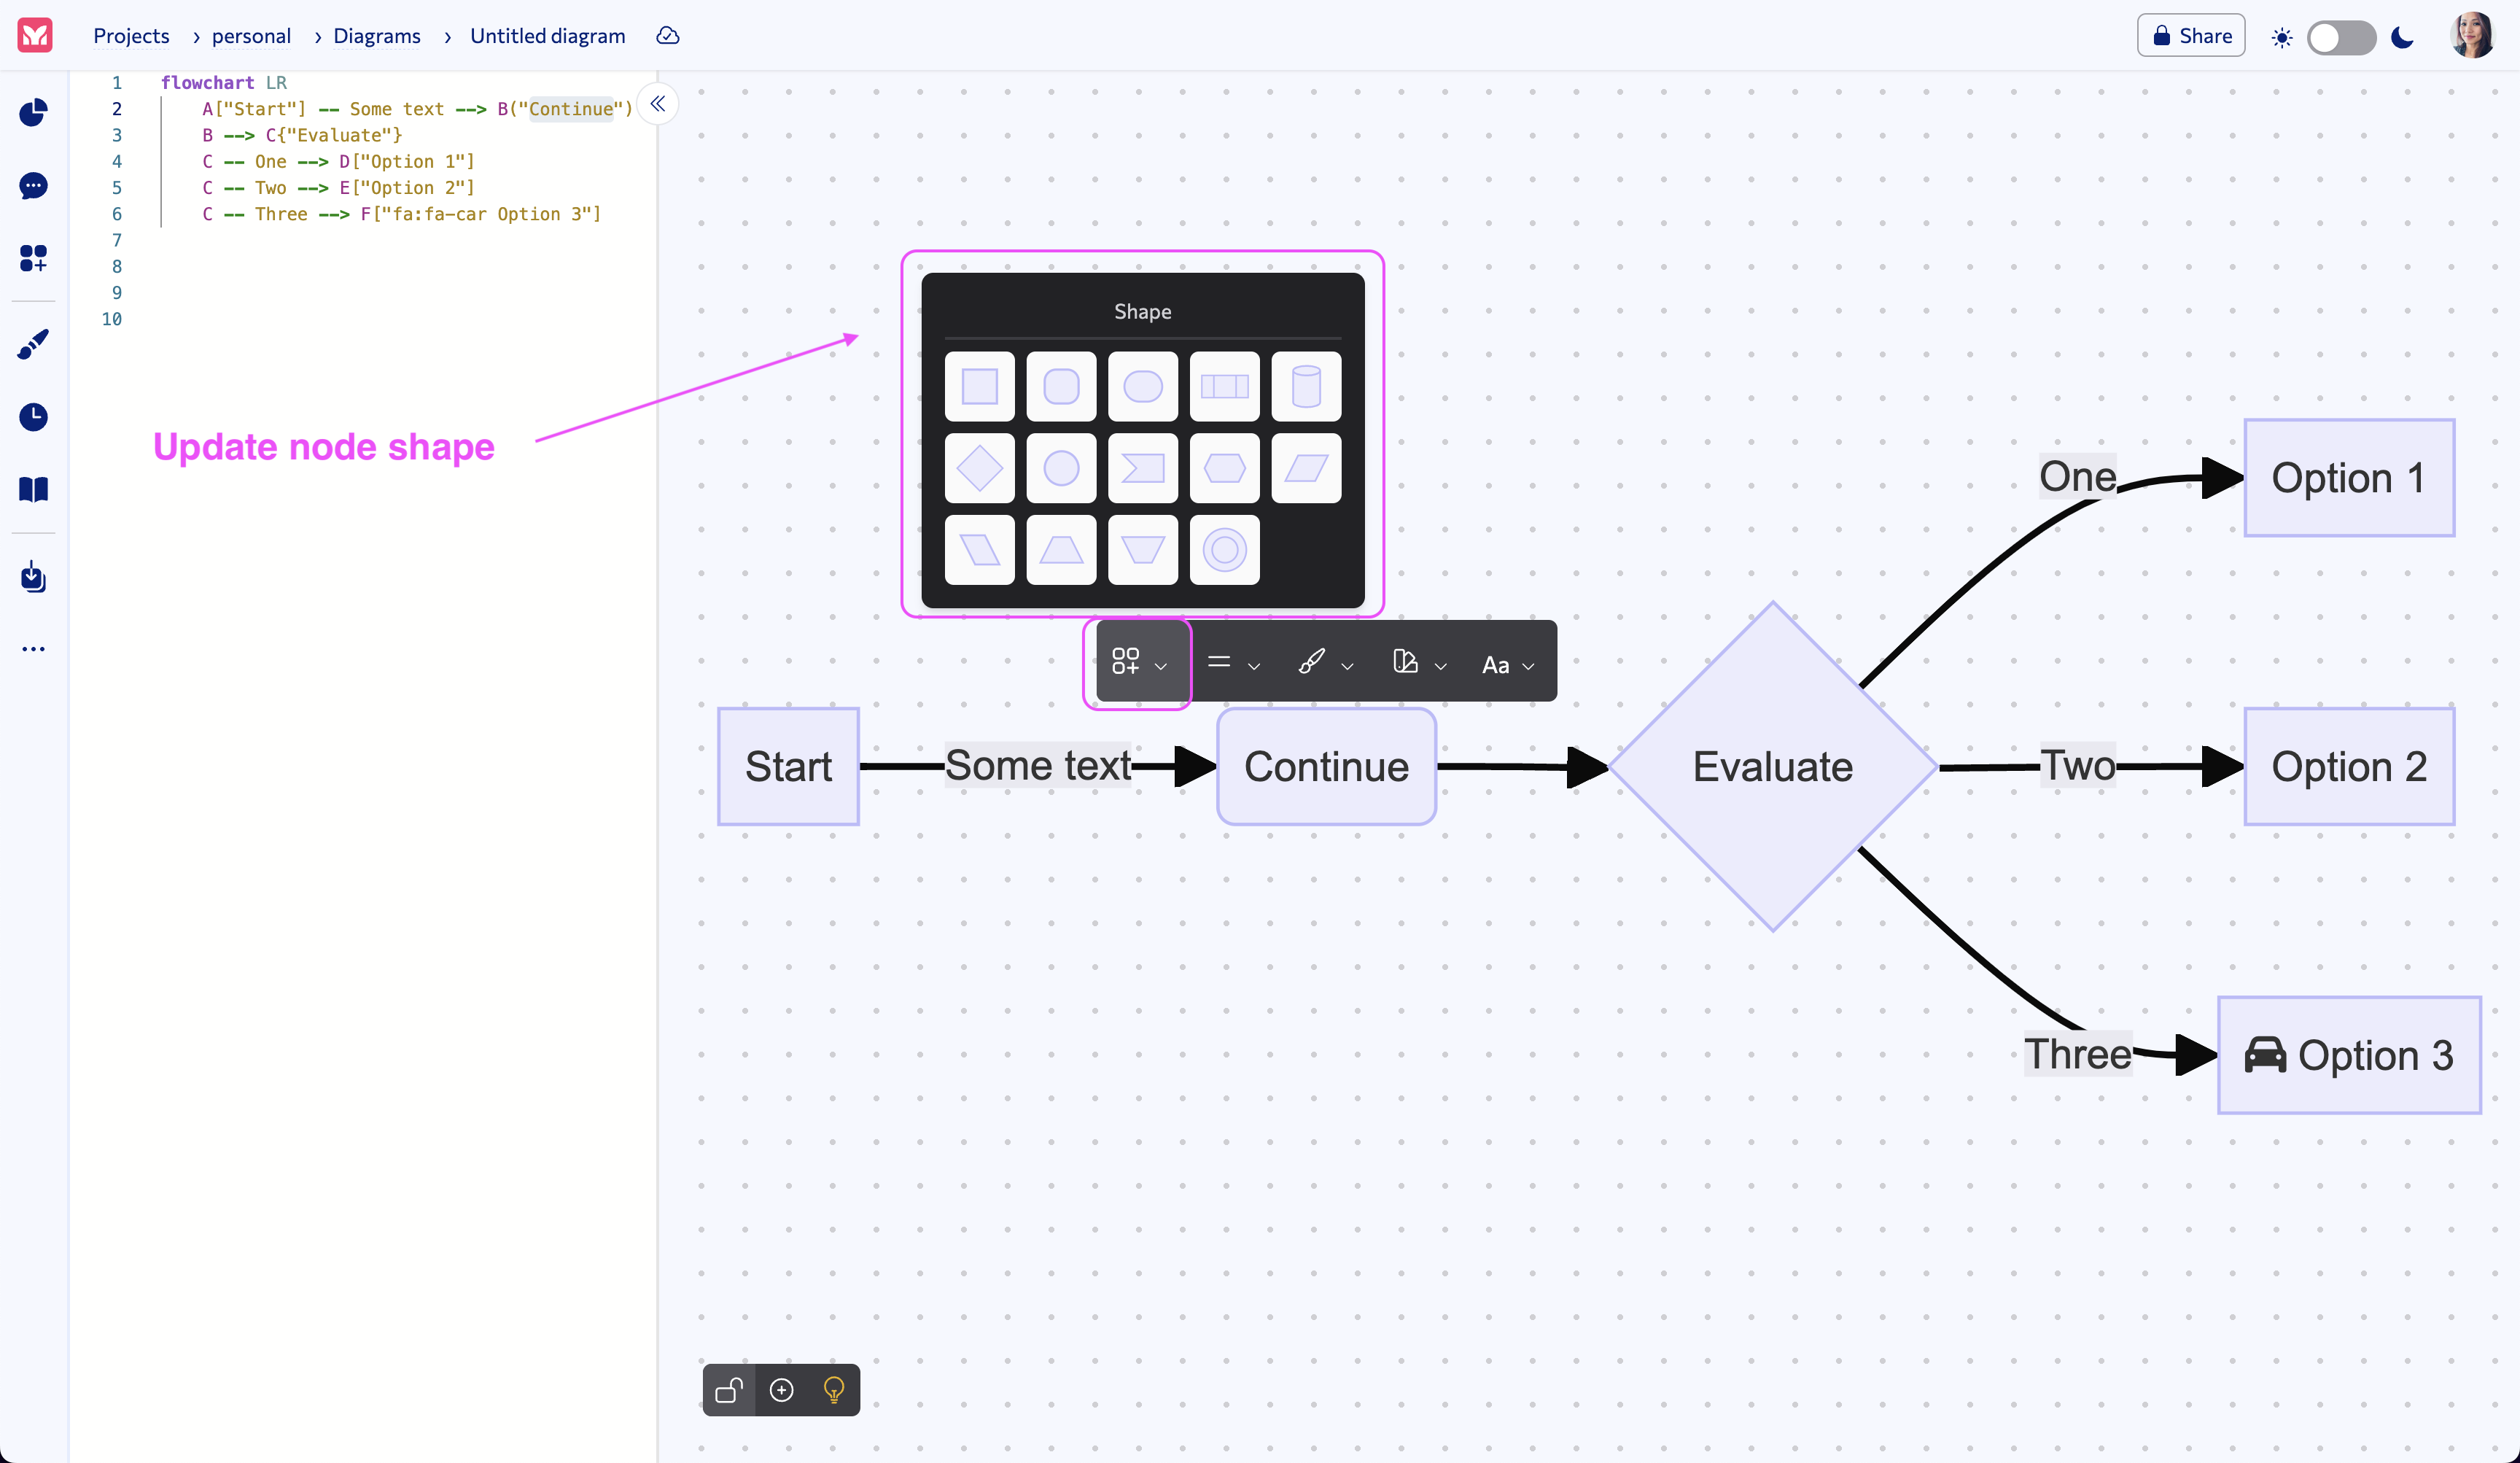
Edit Node
To edit a node, click on the node to bring up the Node menu.
From the node menu, you can:
• Edit the node background color
Edit the node shape
To edit the node shape, click on the first icon in the Node menu to bring up the Shape panel.
From the Shape panel, you can select the shape you want to use for your node.
Screenshot for editing a node shape:
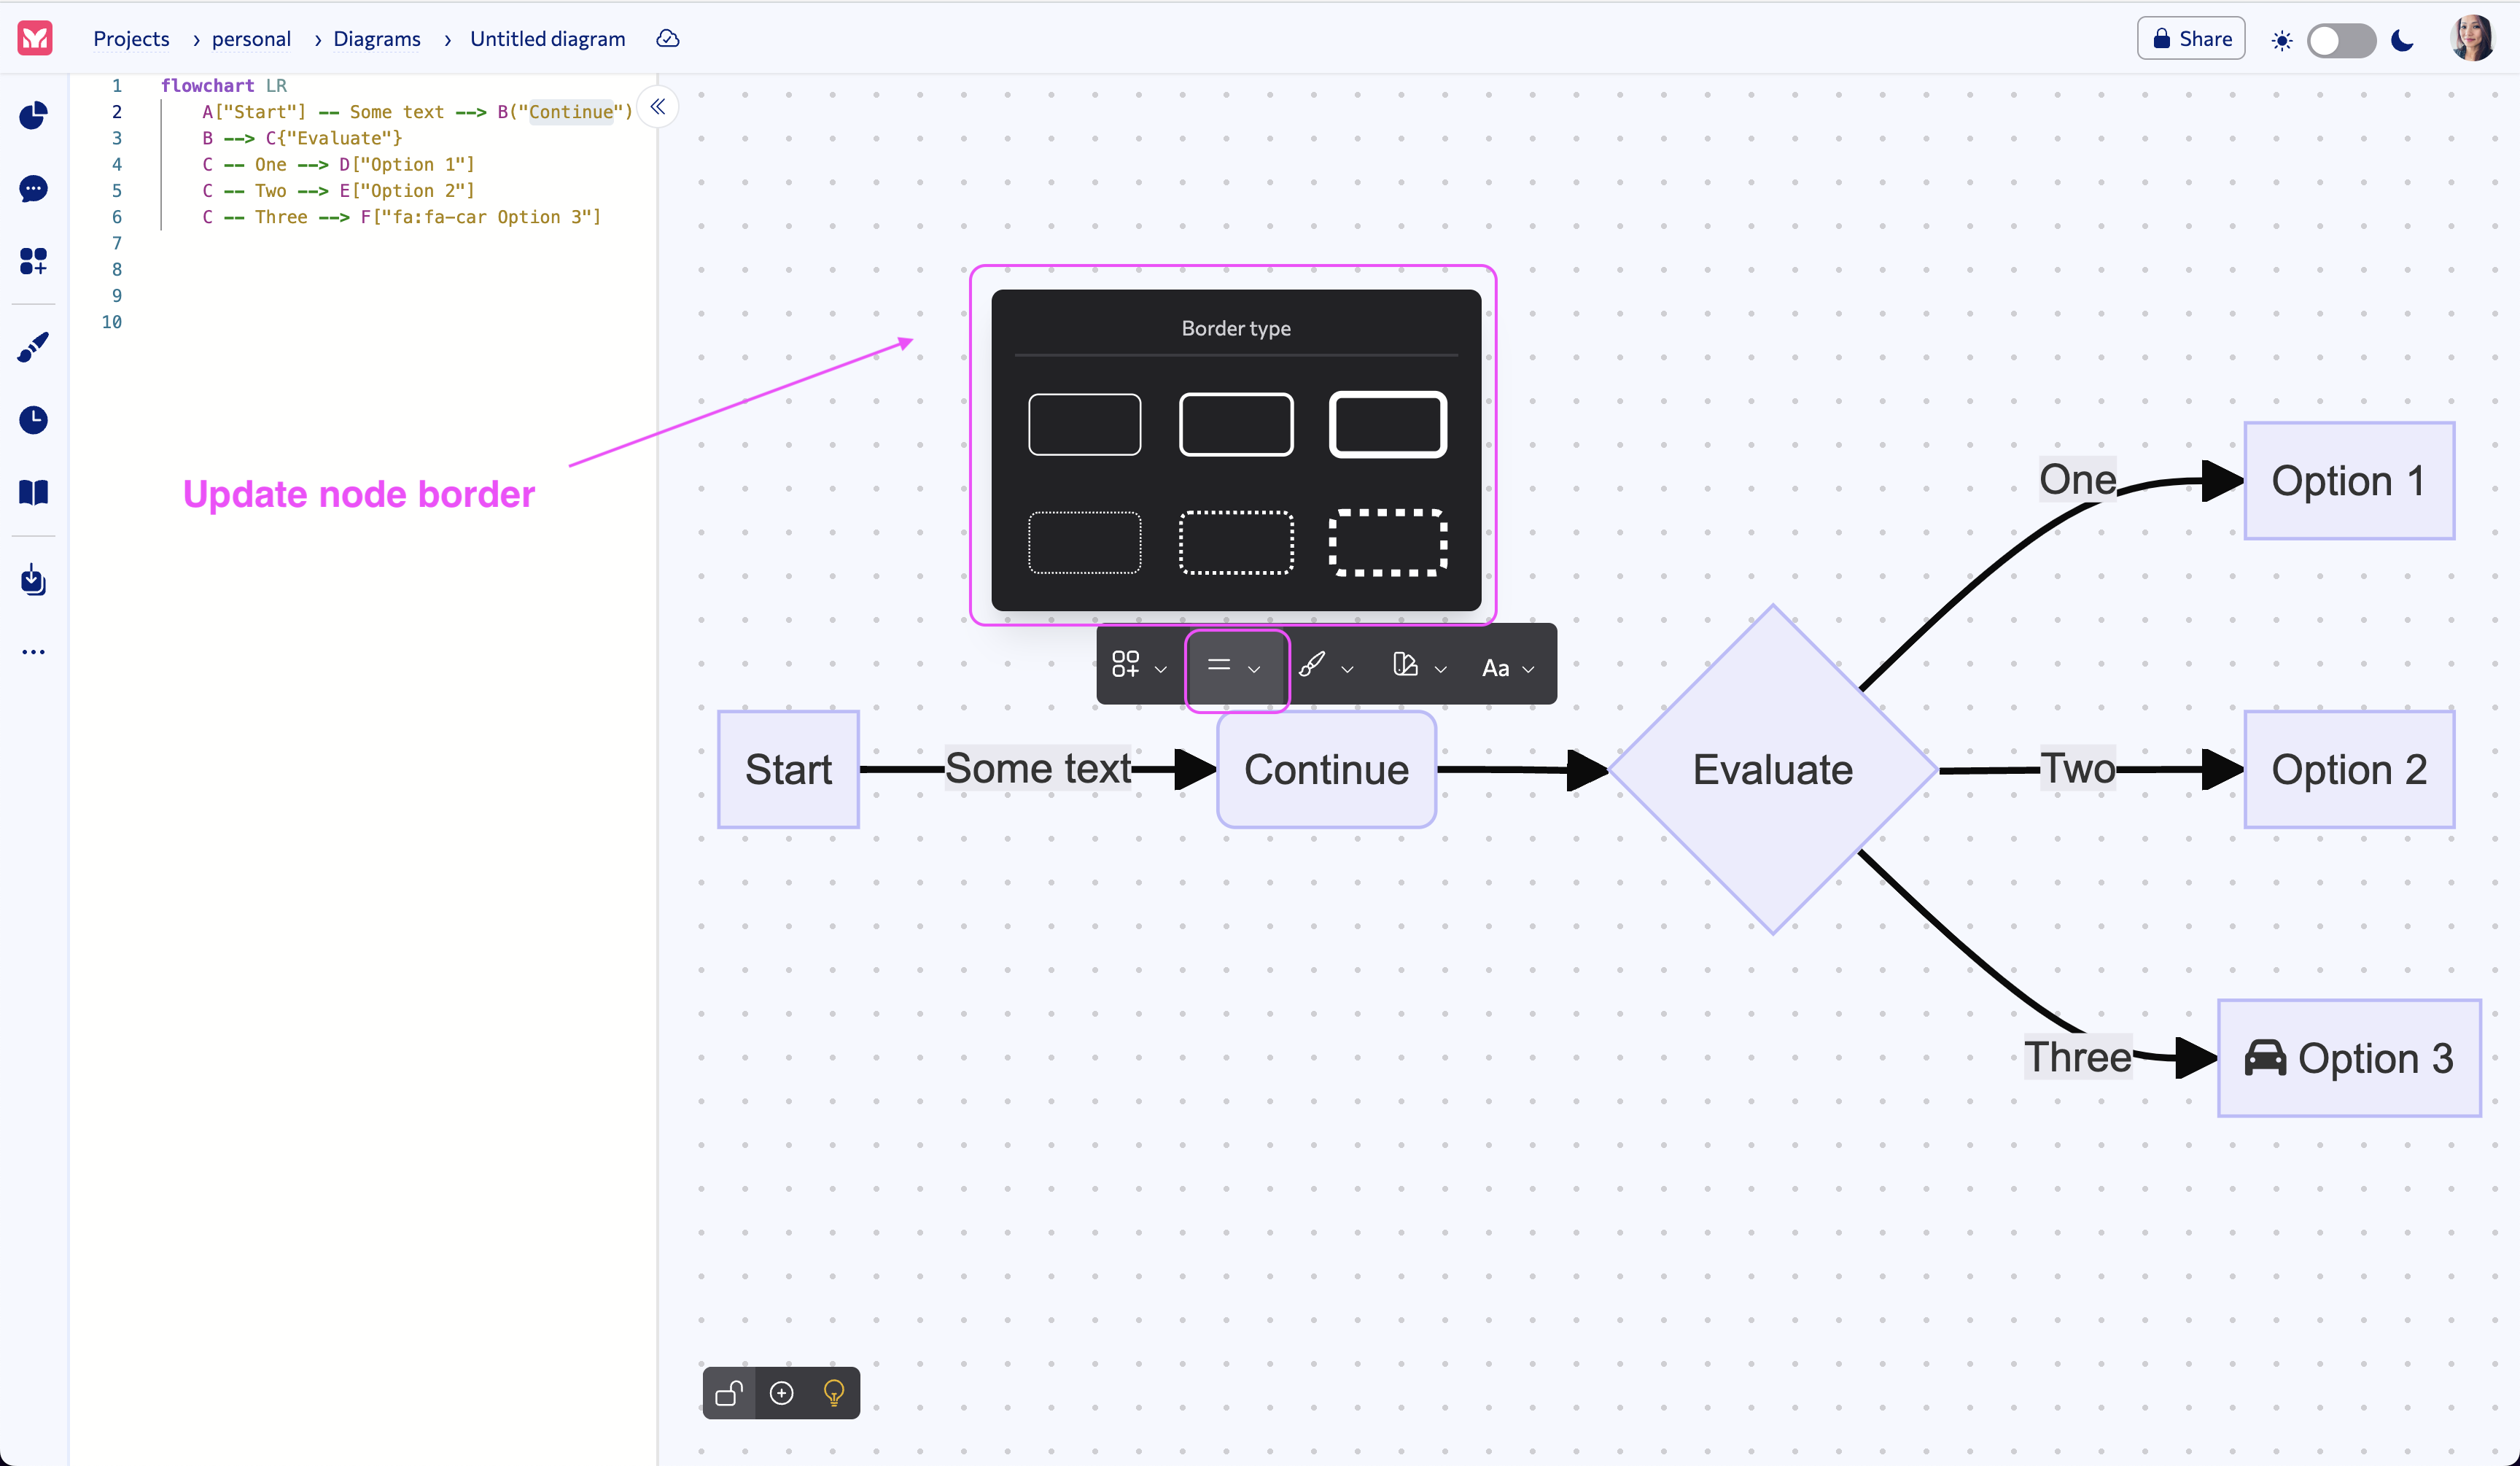
Edit the node border
To edit the node border, click on the second icon in the Node menu to bring up the Border panel.
From the Border panel, you can select the border type you want to use for your node.
Screenshot for editing a node border:
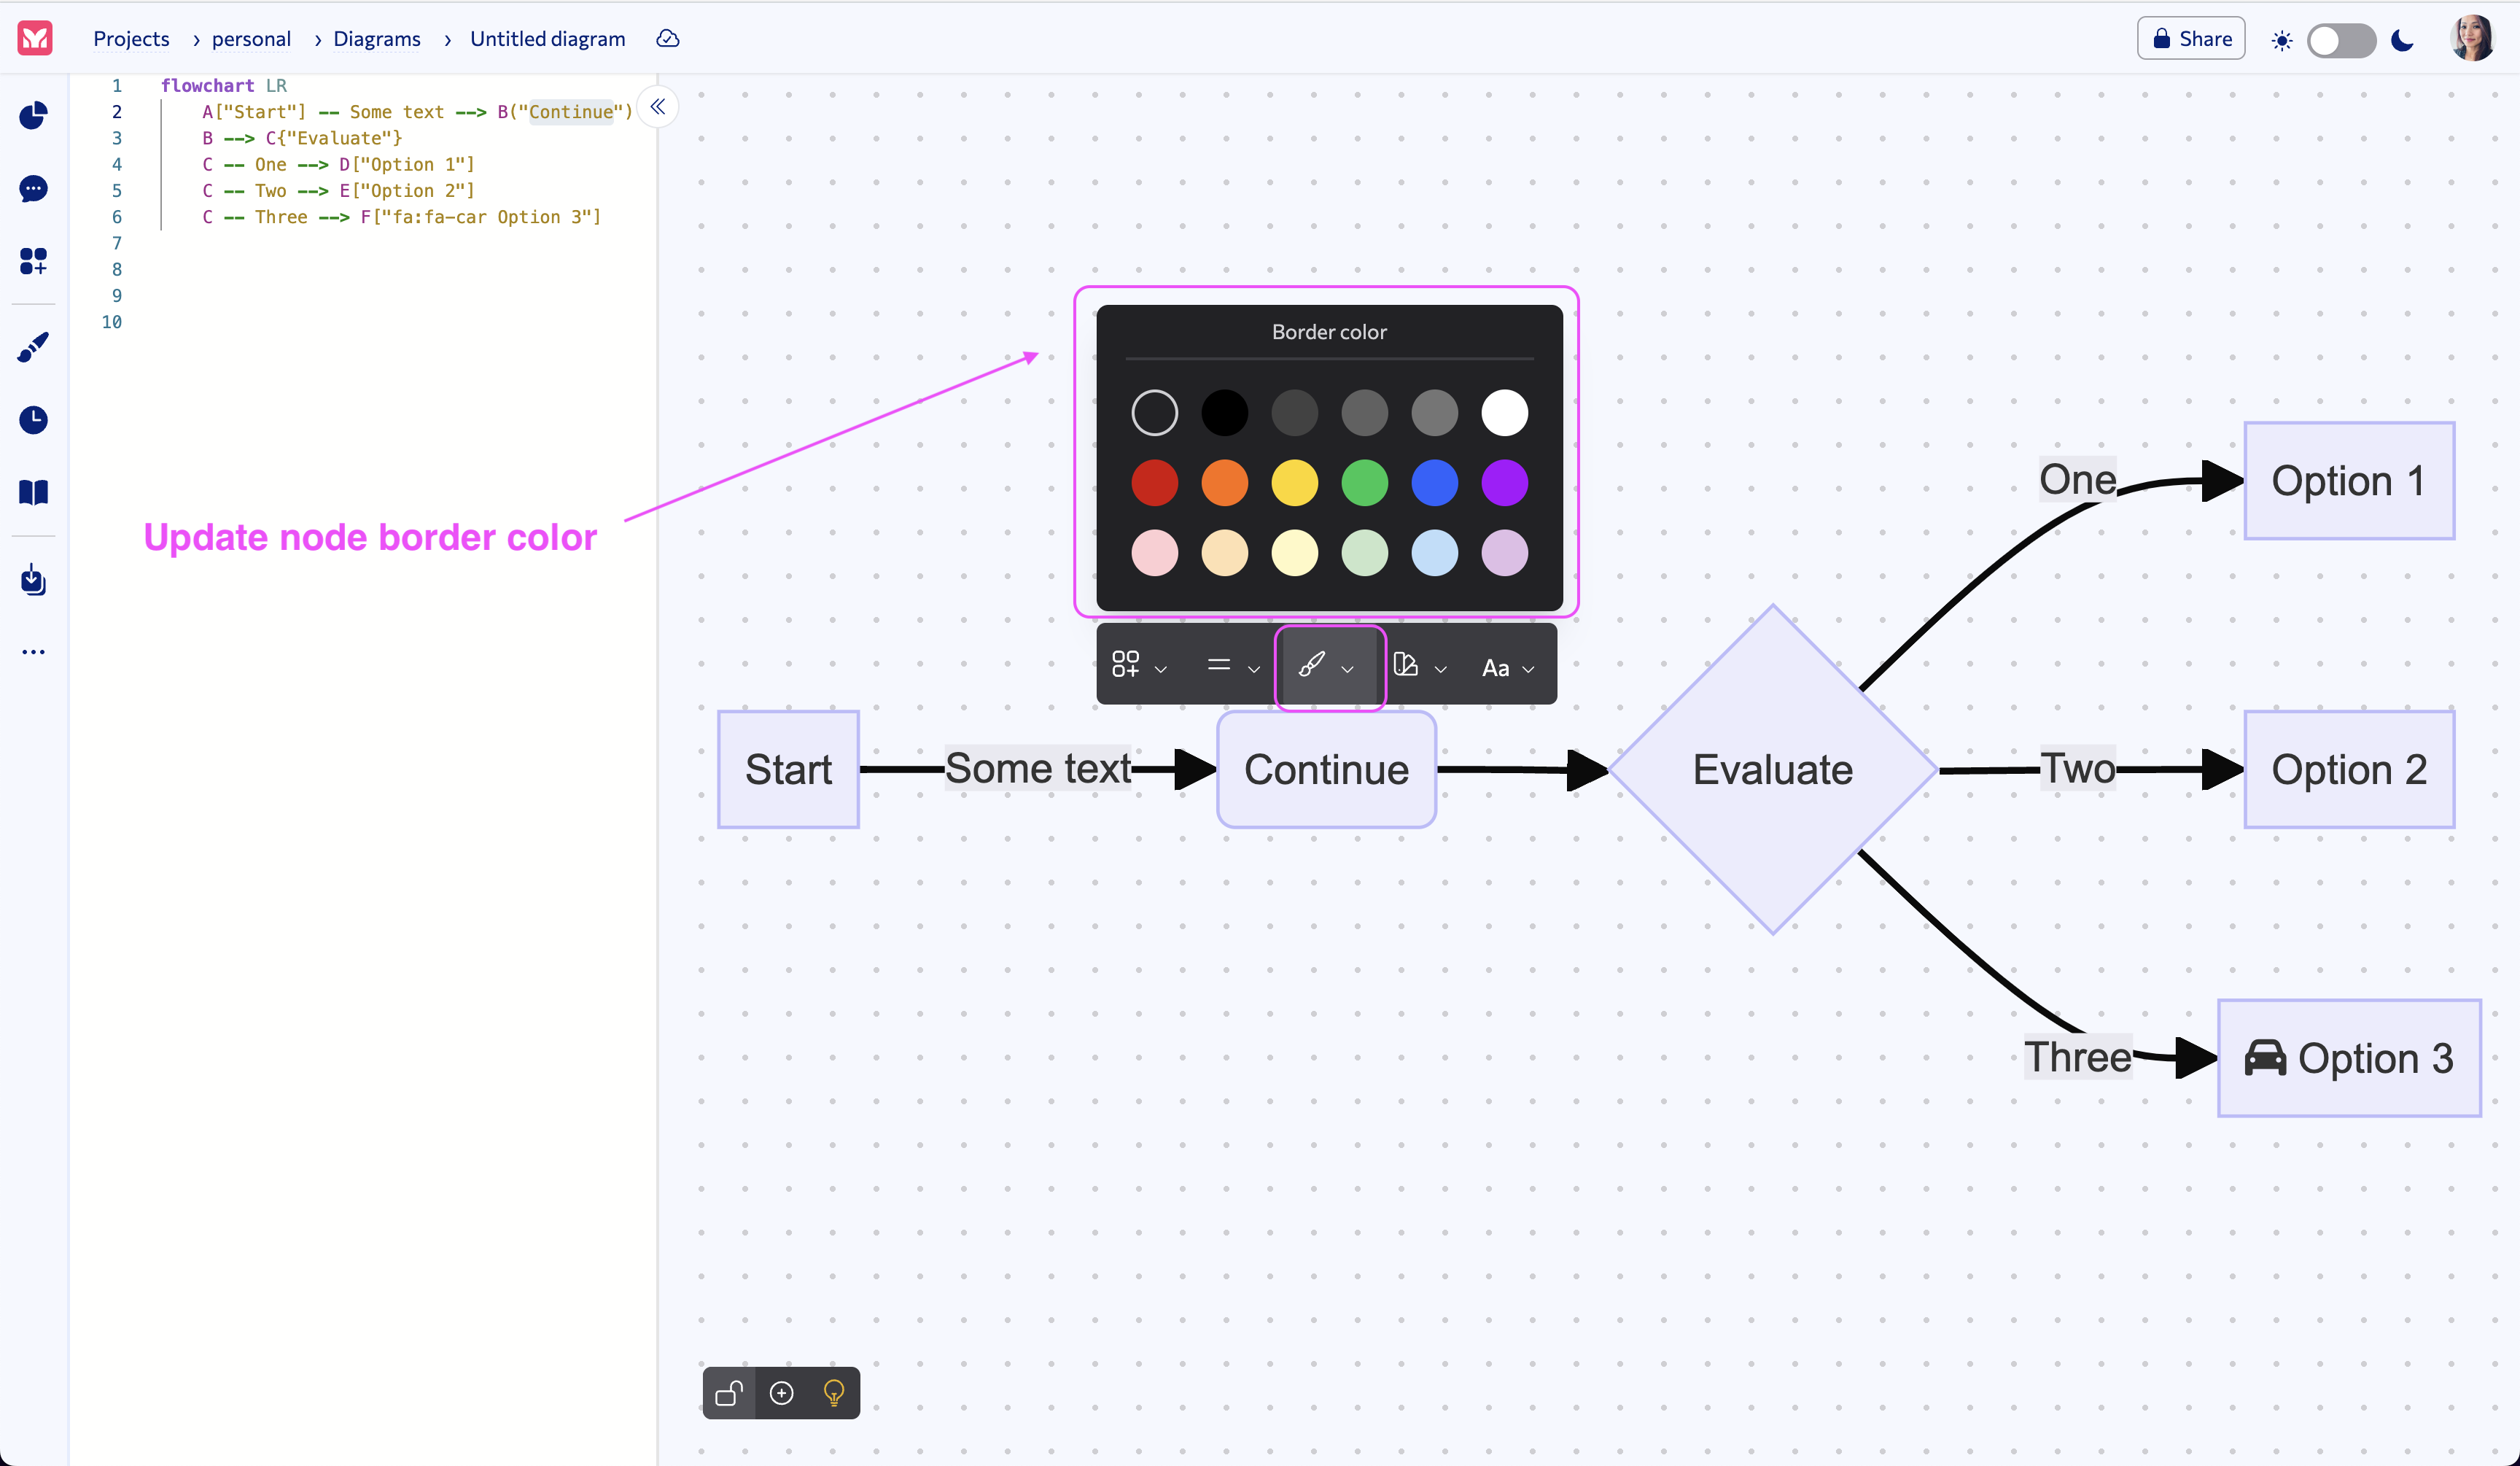
Edit the node border color
To edit the node border color, click on the third icon in the Node menu to bring up the Border Color panel.
From the Border Color panel, you can select the border color you want to use for your node.
Screenshot for editing a node border color:
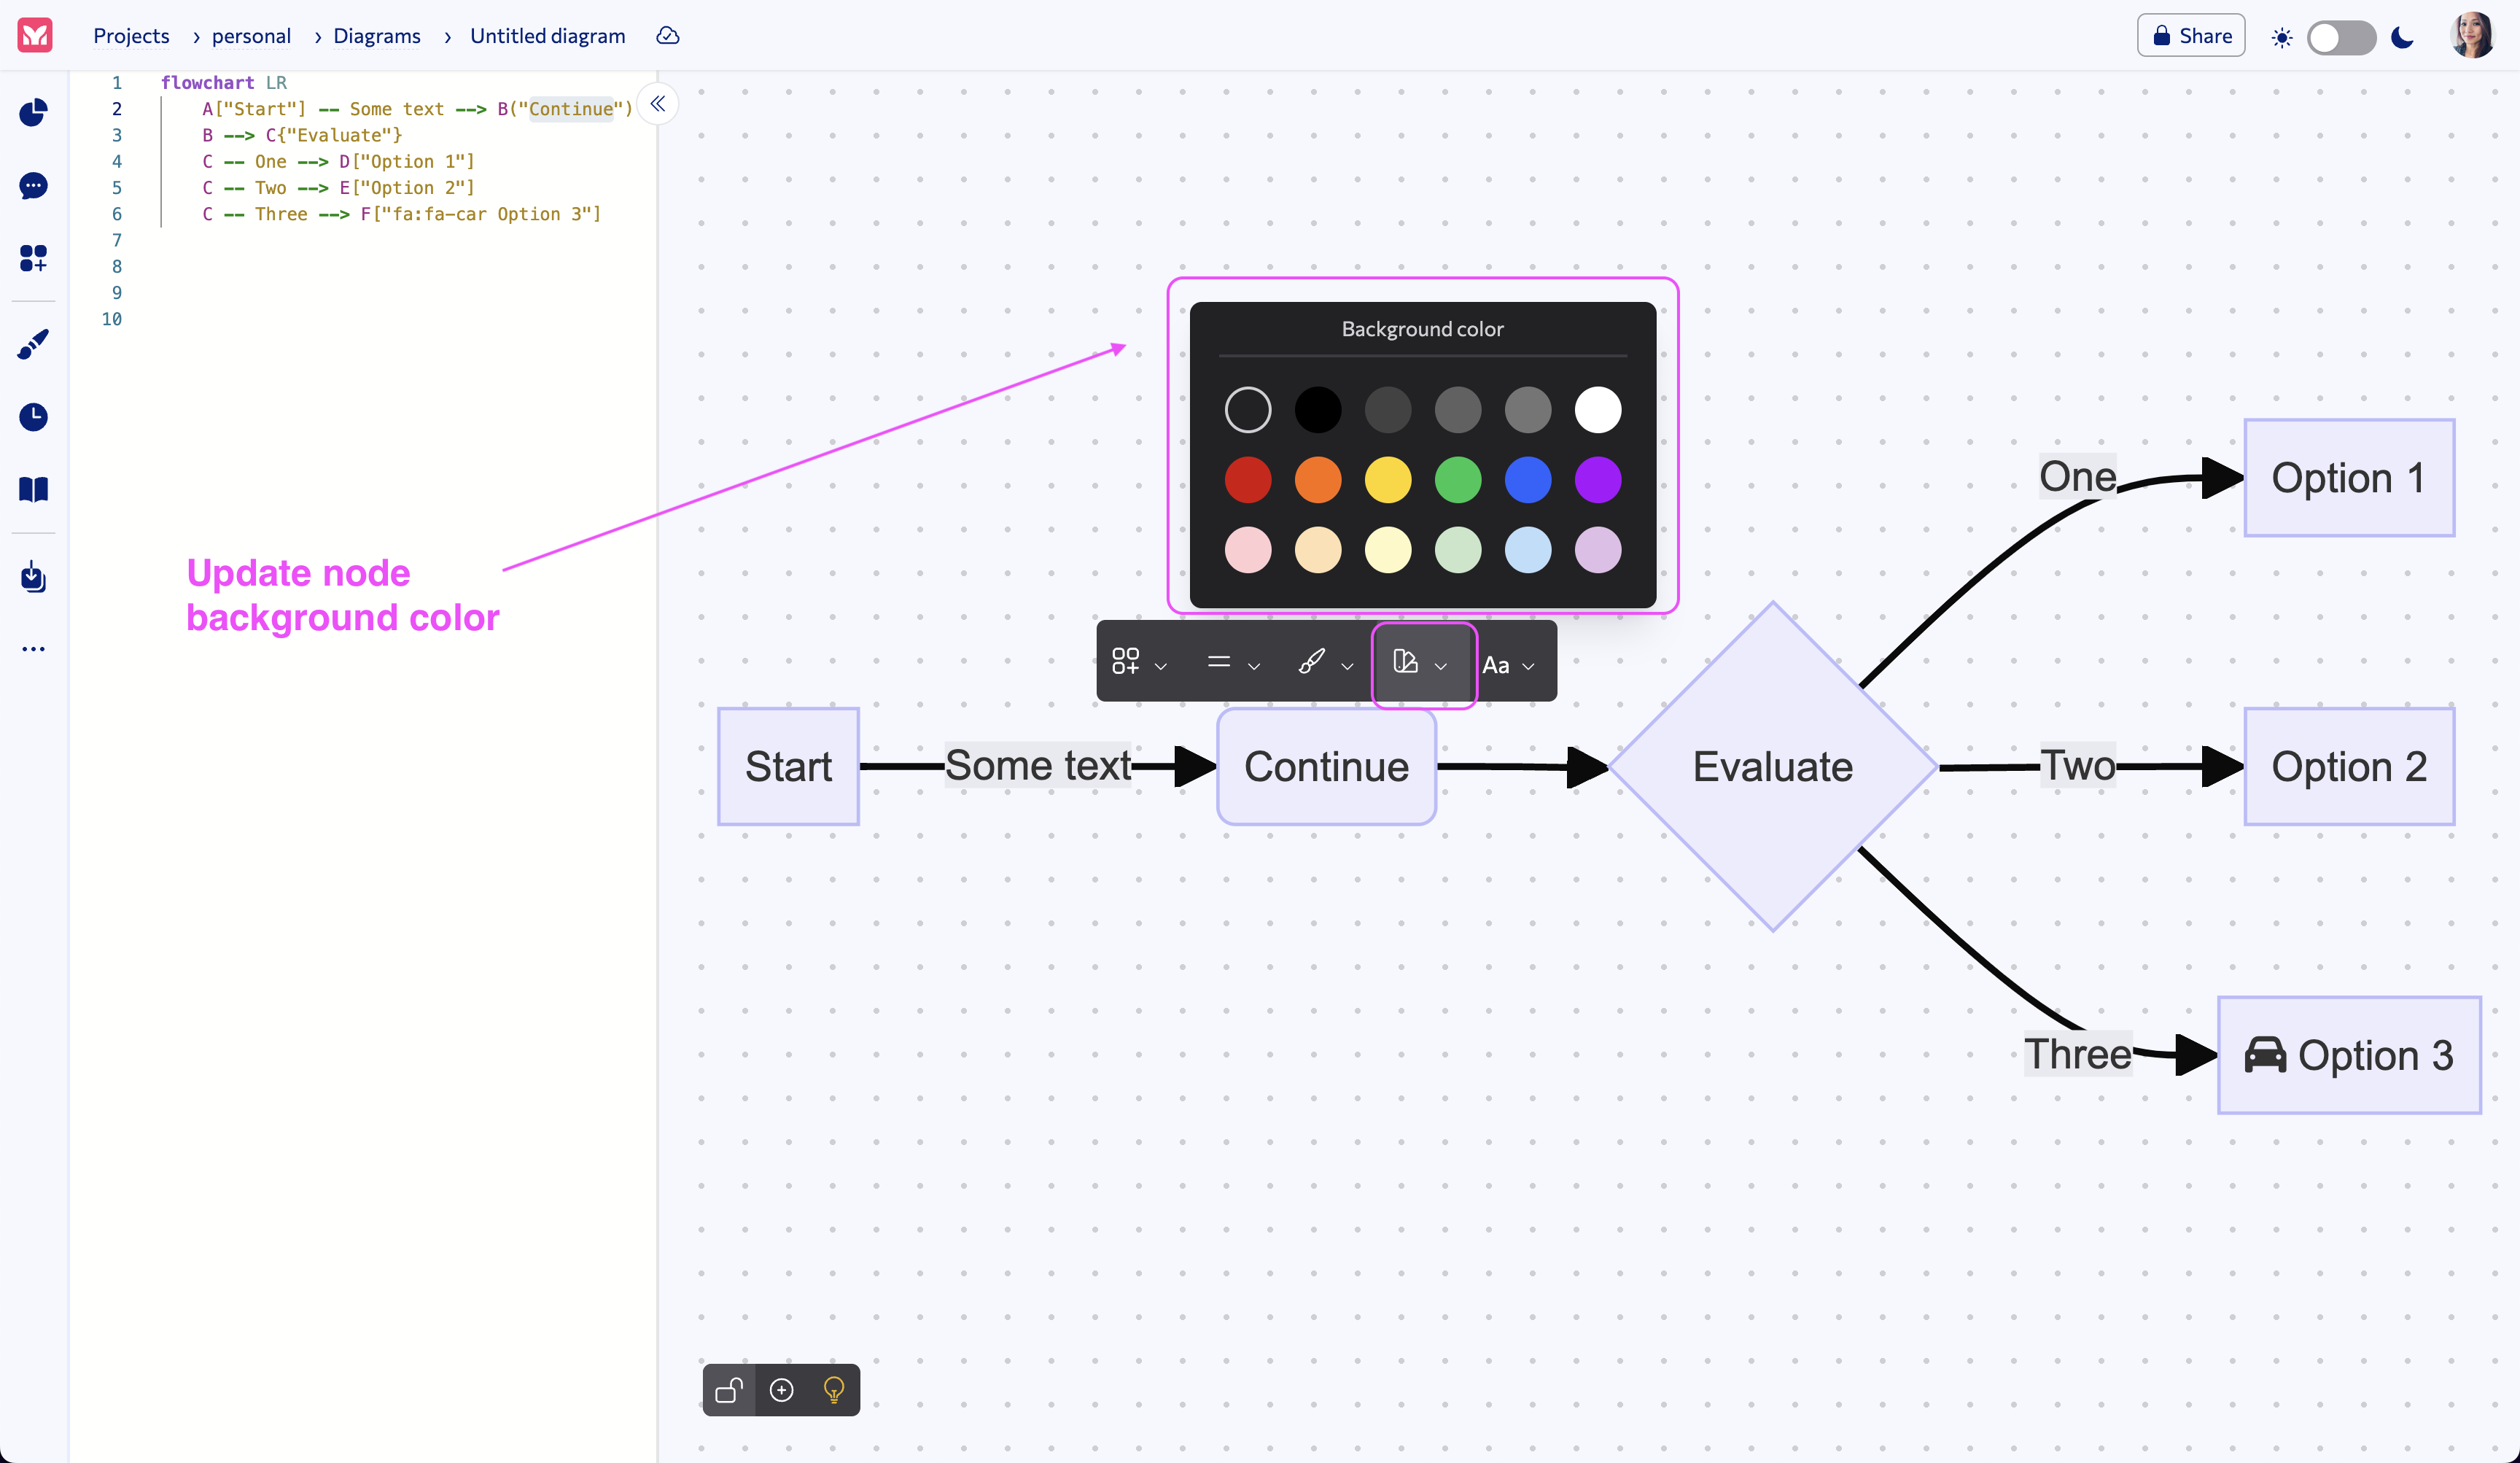
Edit the node background color
To edit the node background color, click on the fourth icon in the Node menu to bring up the Background Color panel.
From the Background Color panel, you can select the background color you want to use for your node.
Screenshot for editing a node background color:
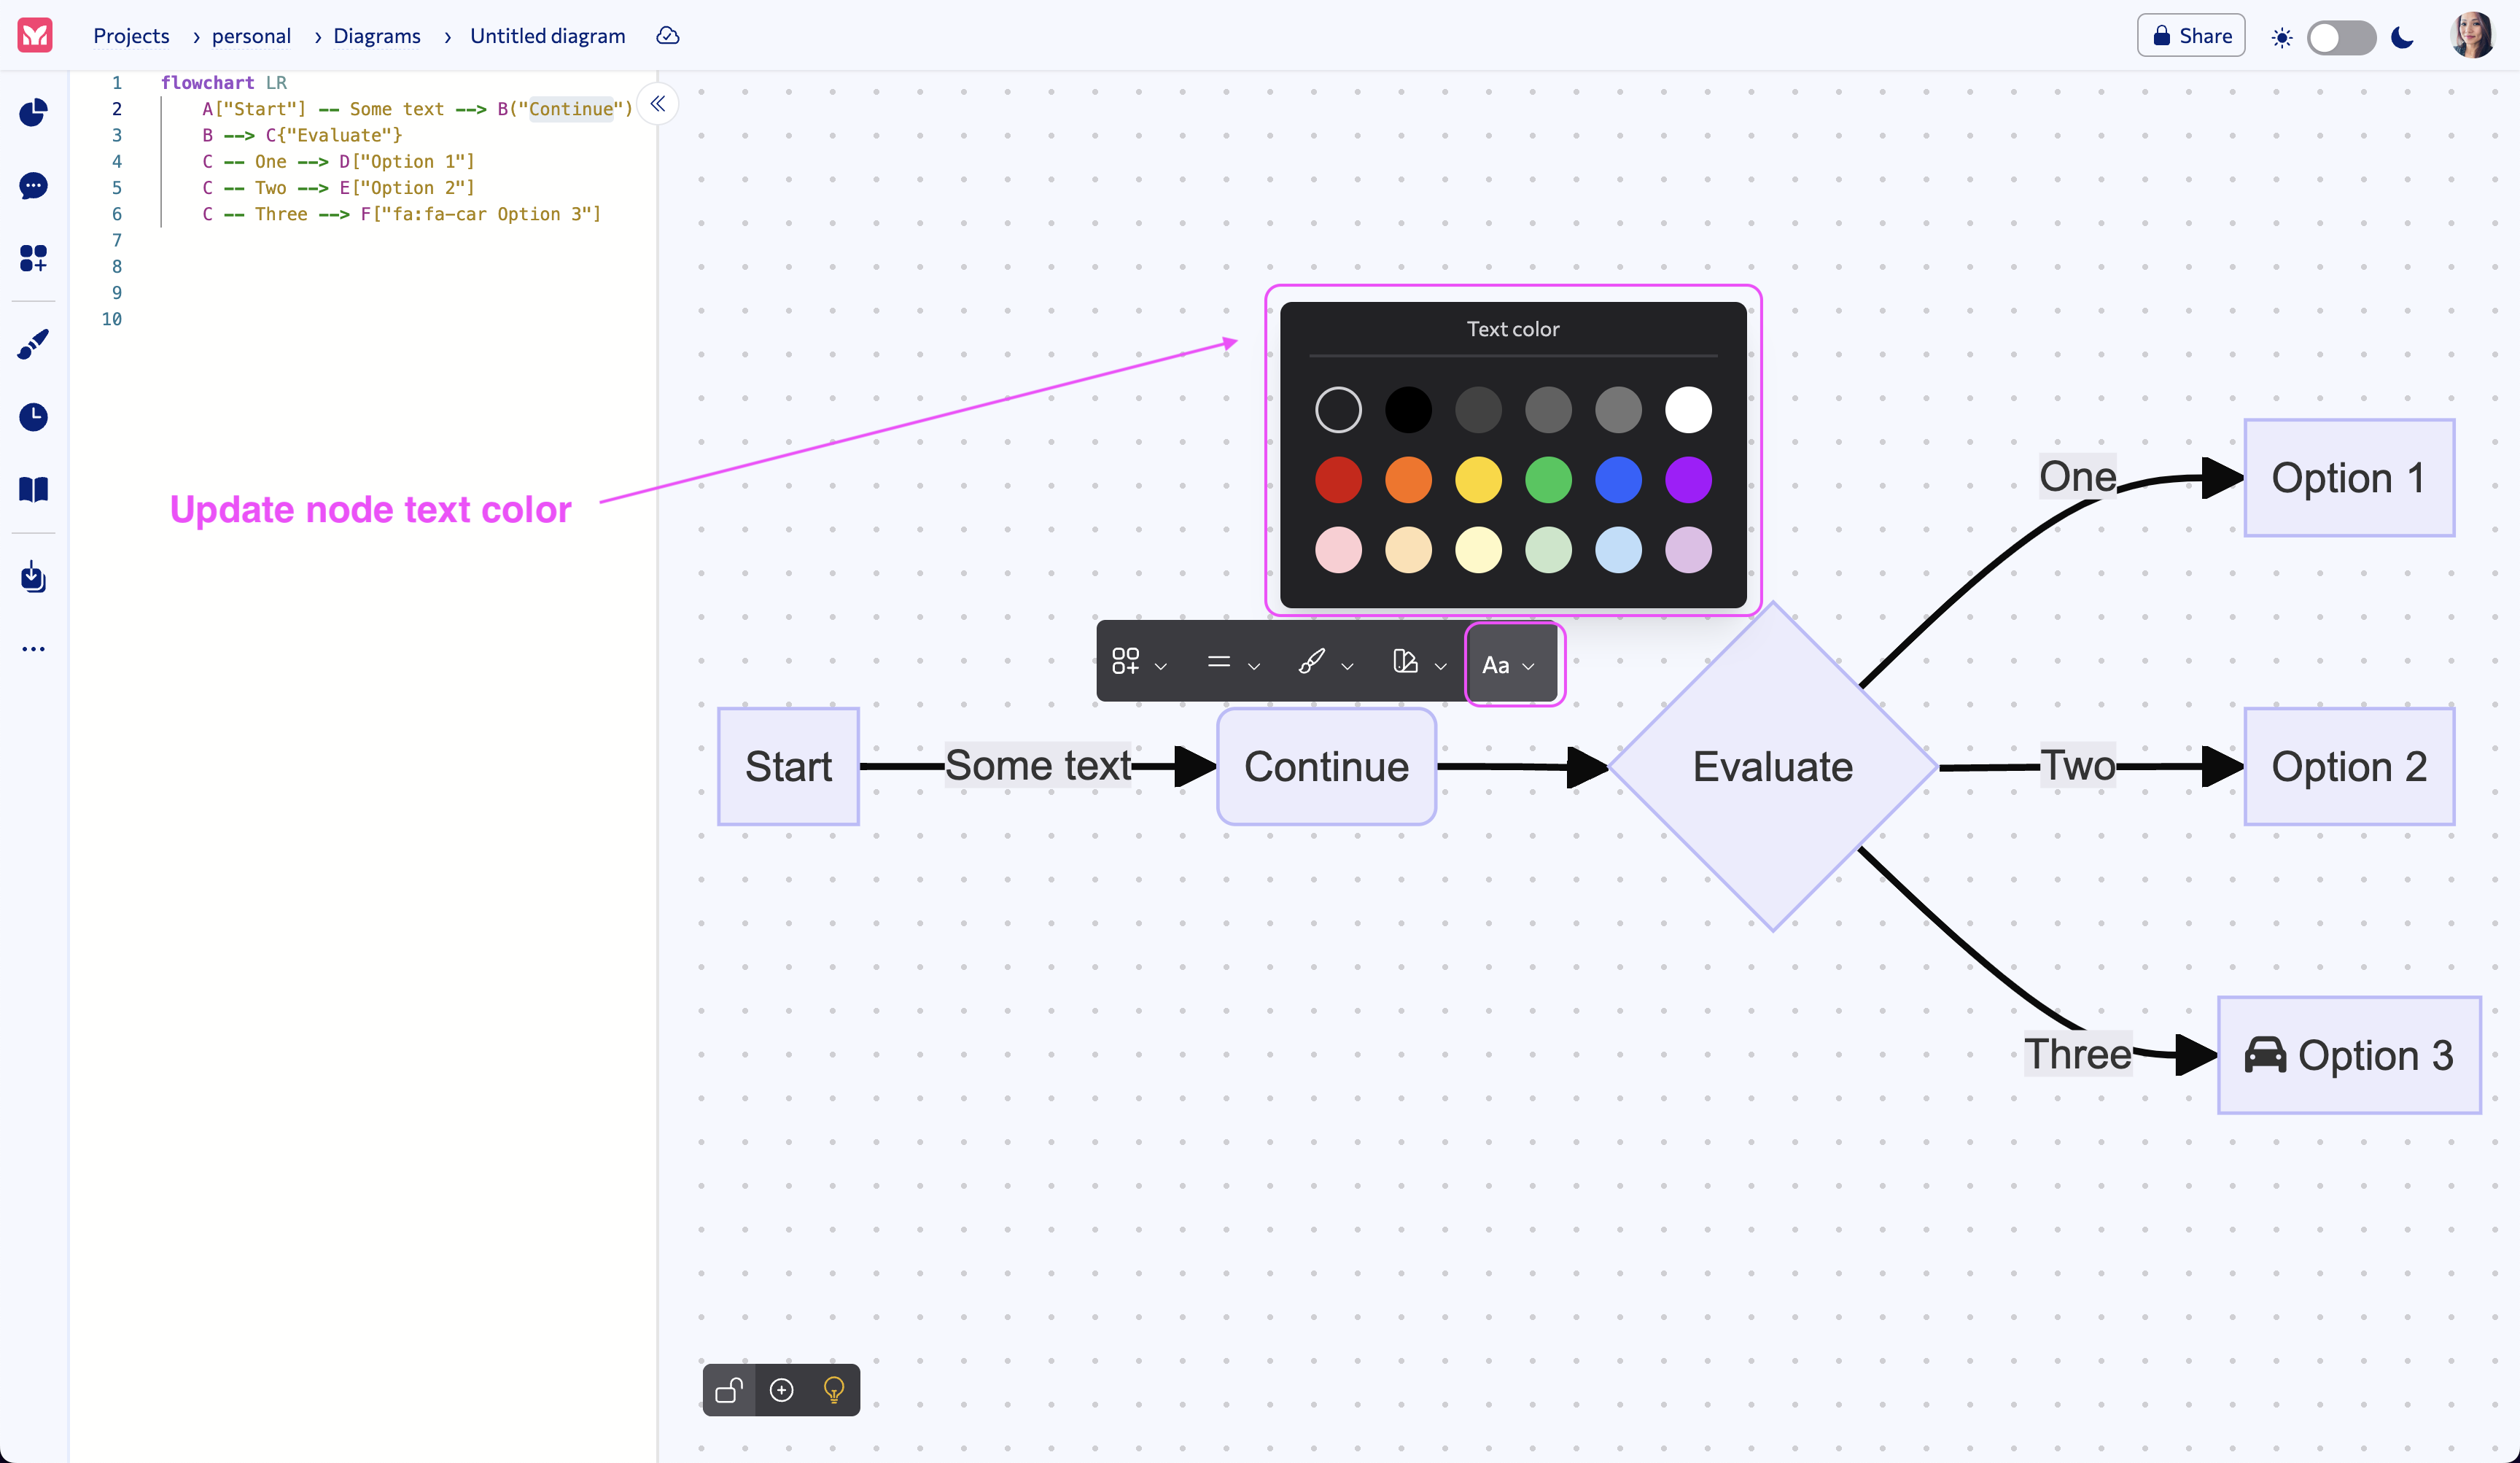
Edit the node text color
To edit the node text color, click on the fifth icon in the Node menu to bring up the Text Color panel.
From the Text Color panel, you can select the text color you want to use for your node.
Screenshot for editing a node text color:
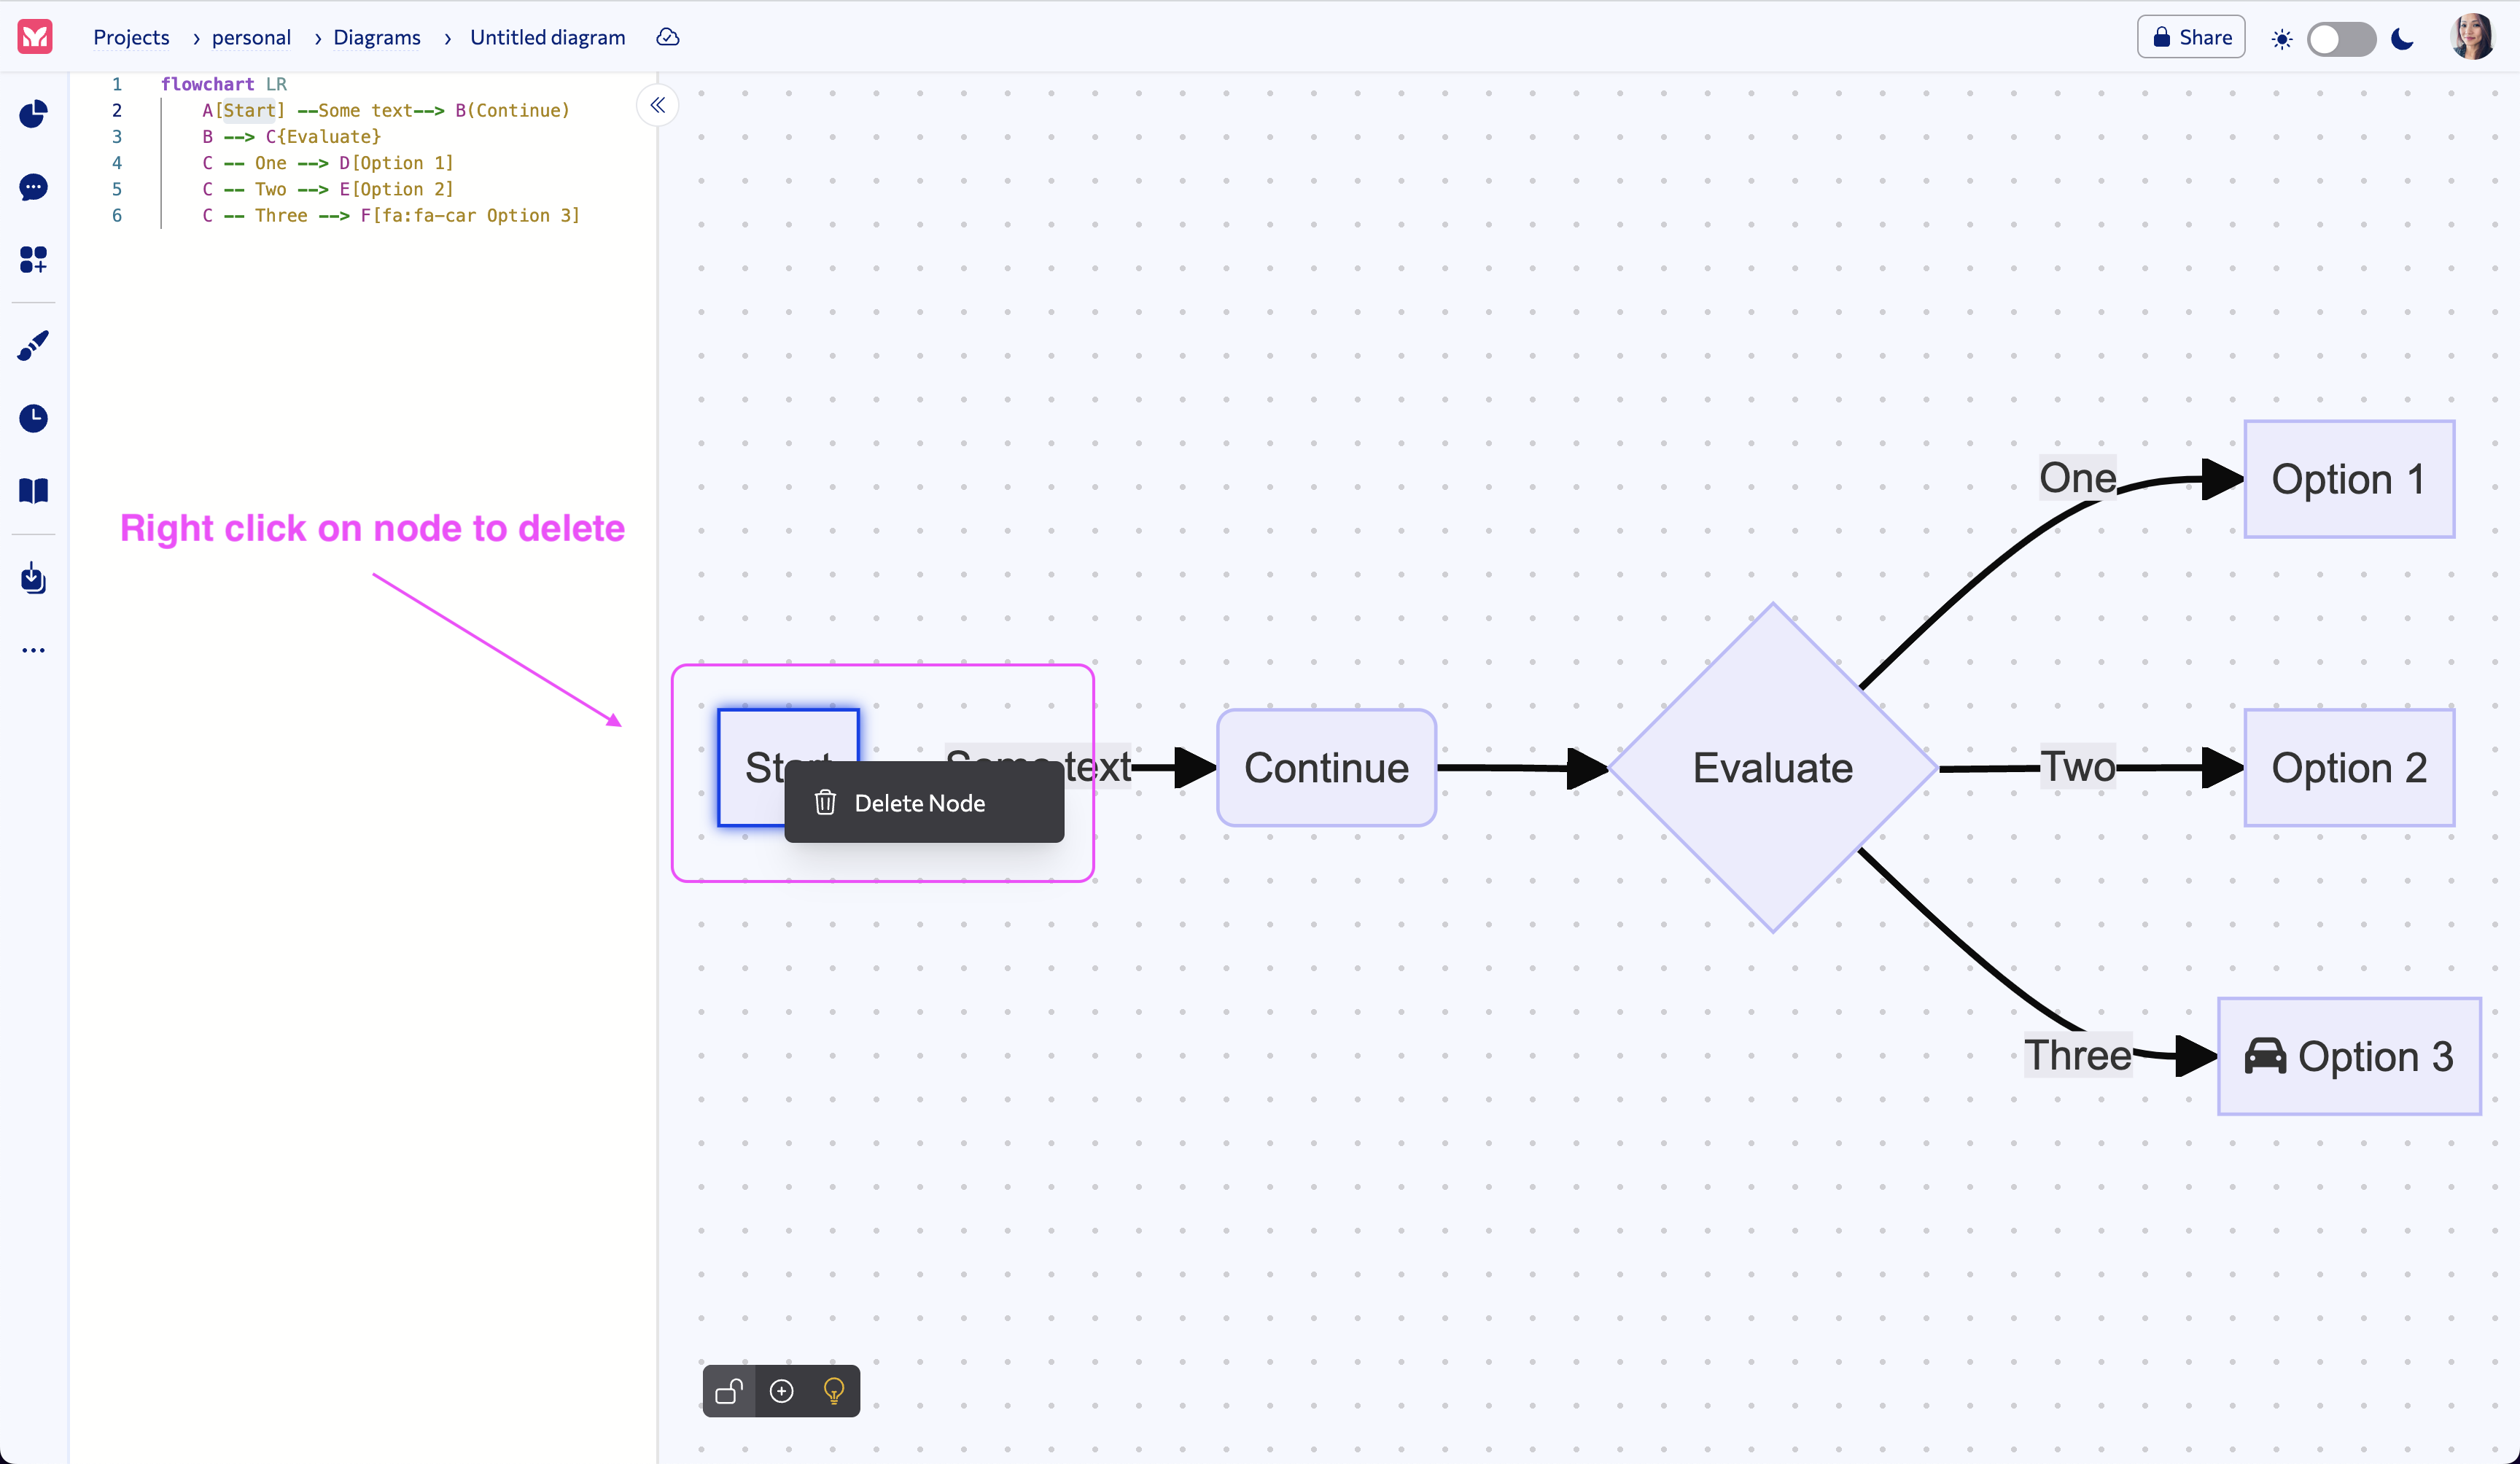
Delete Node
To delete a node, right-click on the node, and click on the “Delete Node” option.
Screenshot for deleting a node:
Edit Edge
To edit an edge, click on the edge to bring up the Edge menu.
From the Edge menu, you can:
Edit the edge arrow
To edit an edge arrow, click on the first icon in the Edge menu to bring up the Arrow panel.
From the Arrow panel, you can select the arrow type you want to use for your edge.
Screenshot for editing an edge arrow:
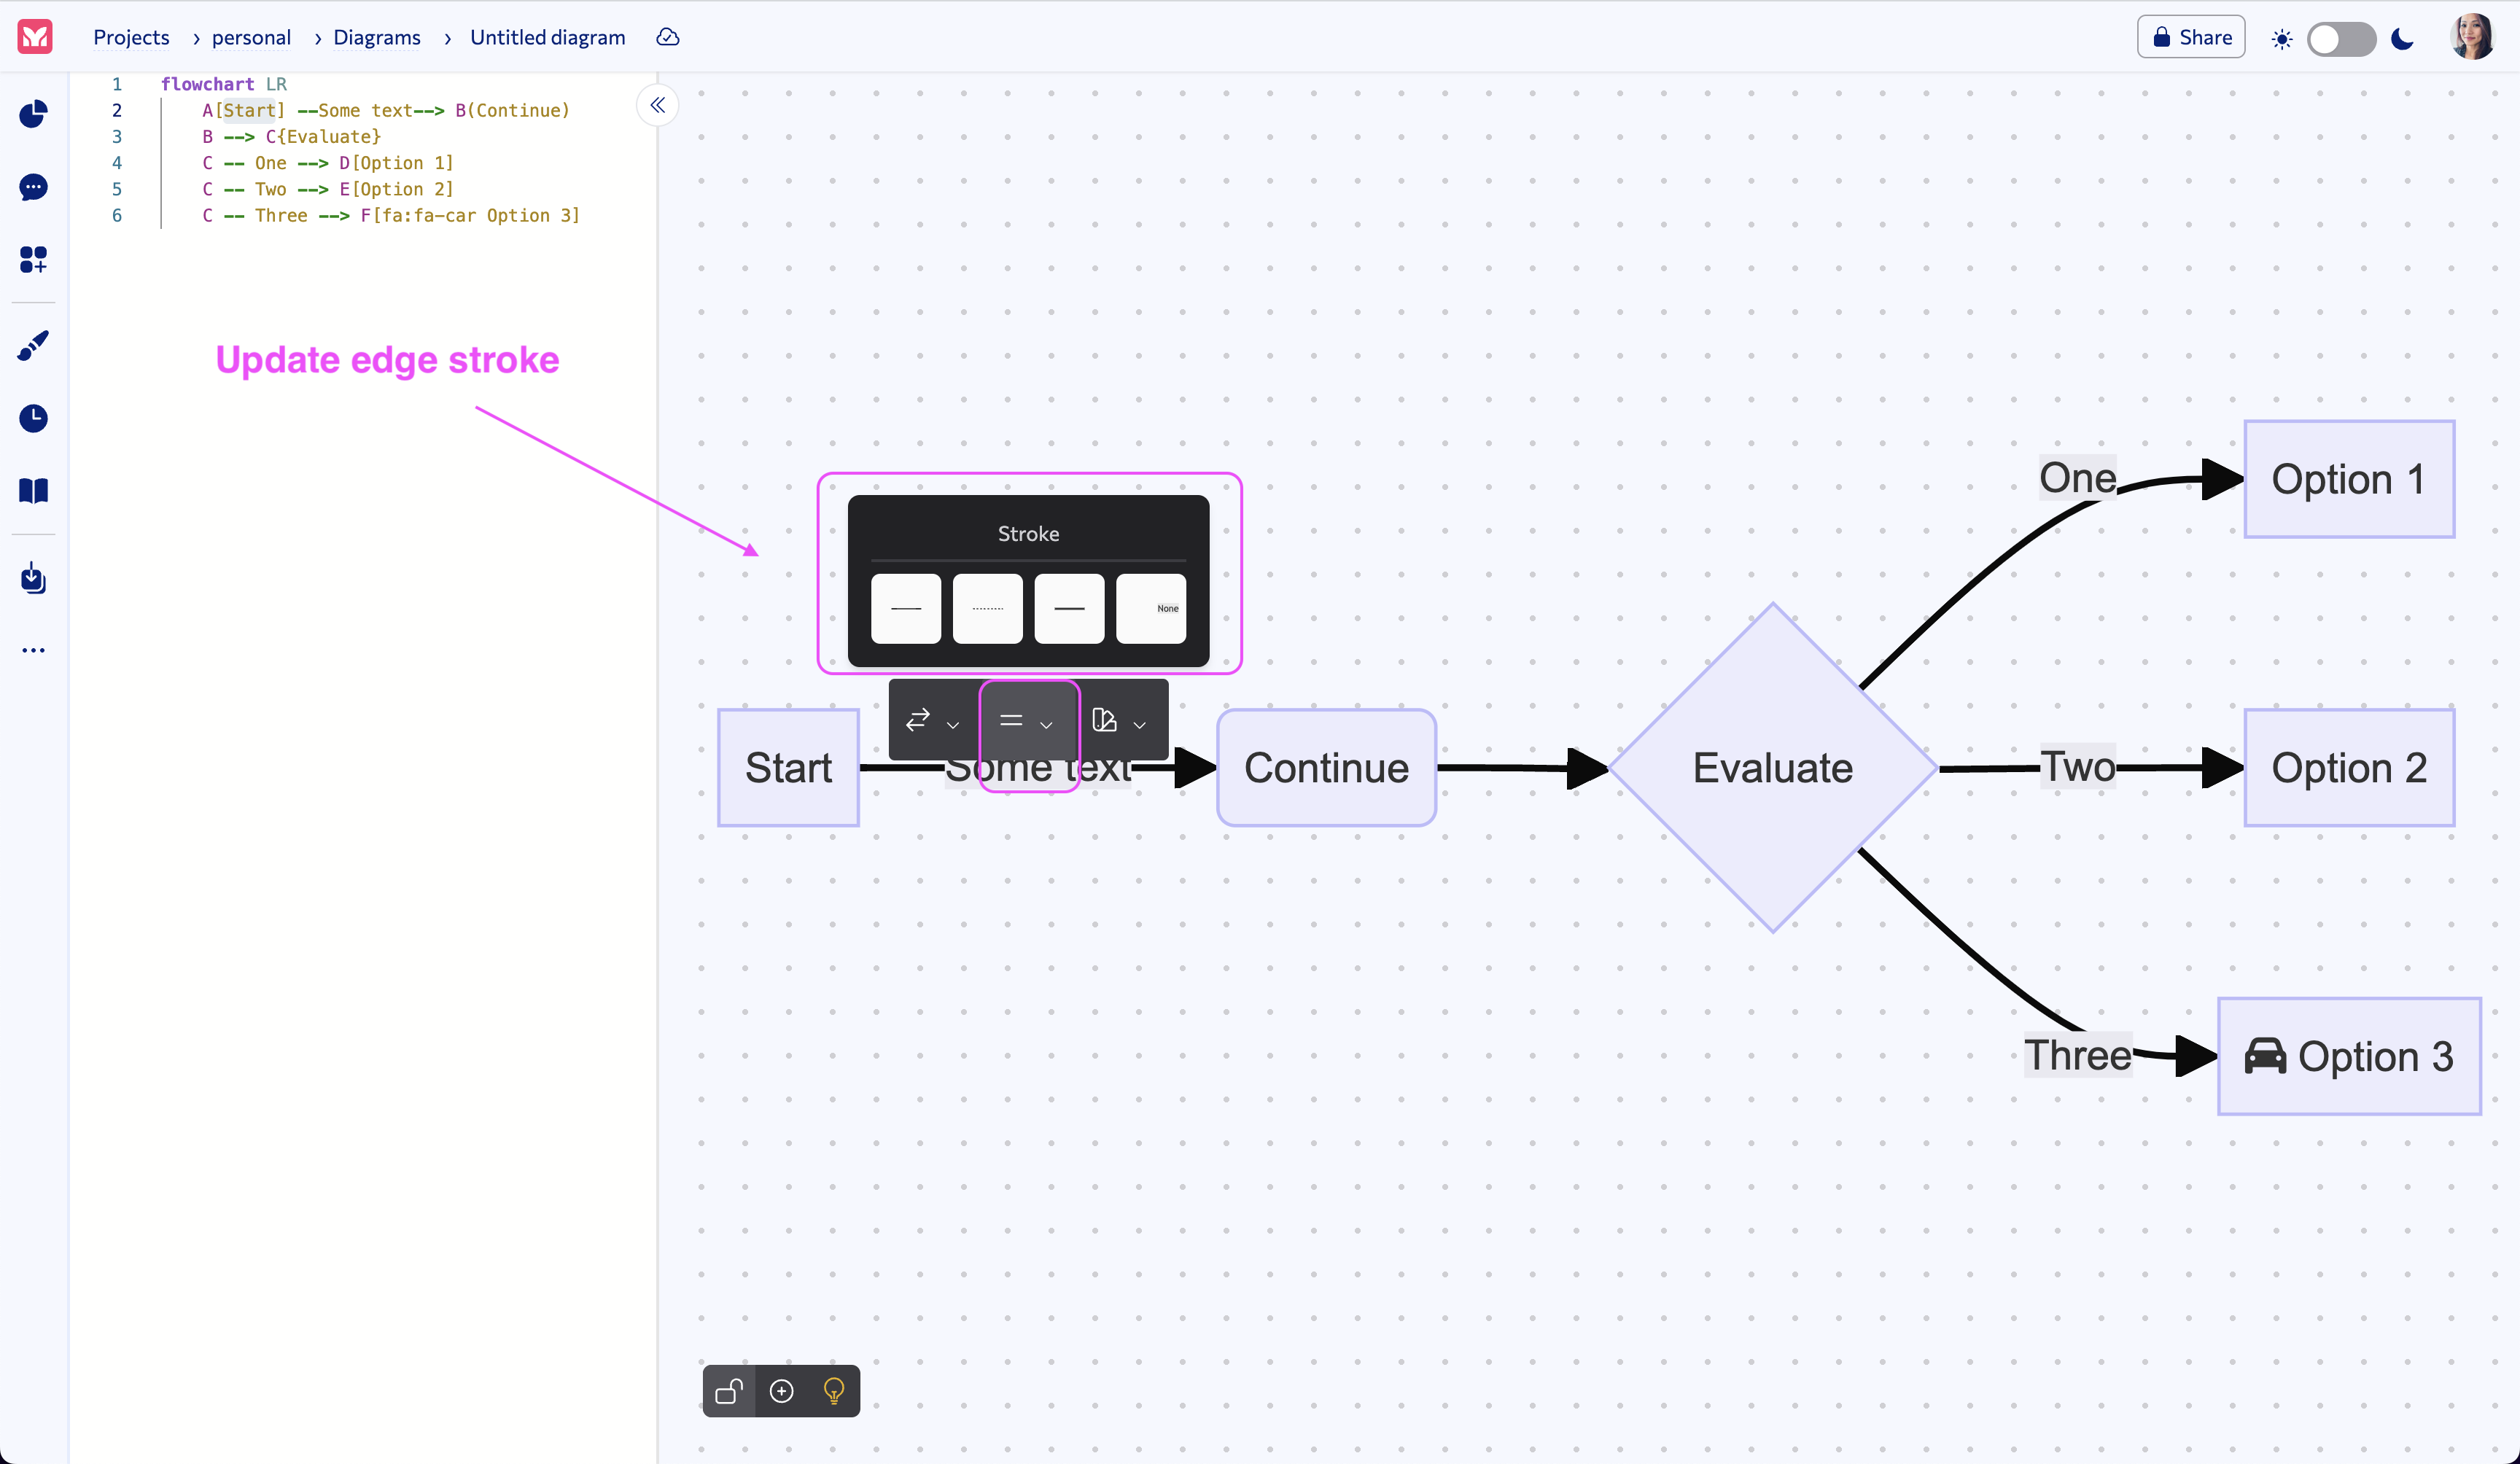
Edit the edge stroke
To edit an edge stroke, click on the second icon in the Edge menu to bring up the Stroke panel.
From the Stroke panel, you can select the stroke type you want to use for your edge.
Screenshot for editing an edge stroke:
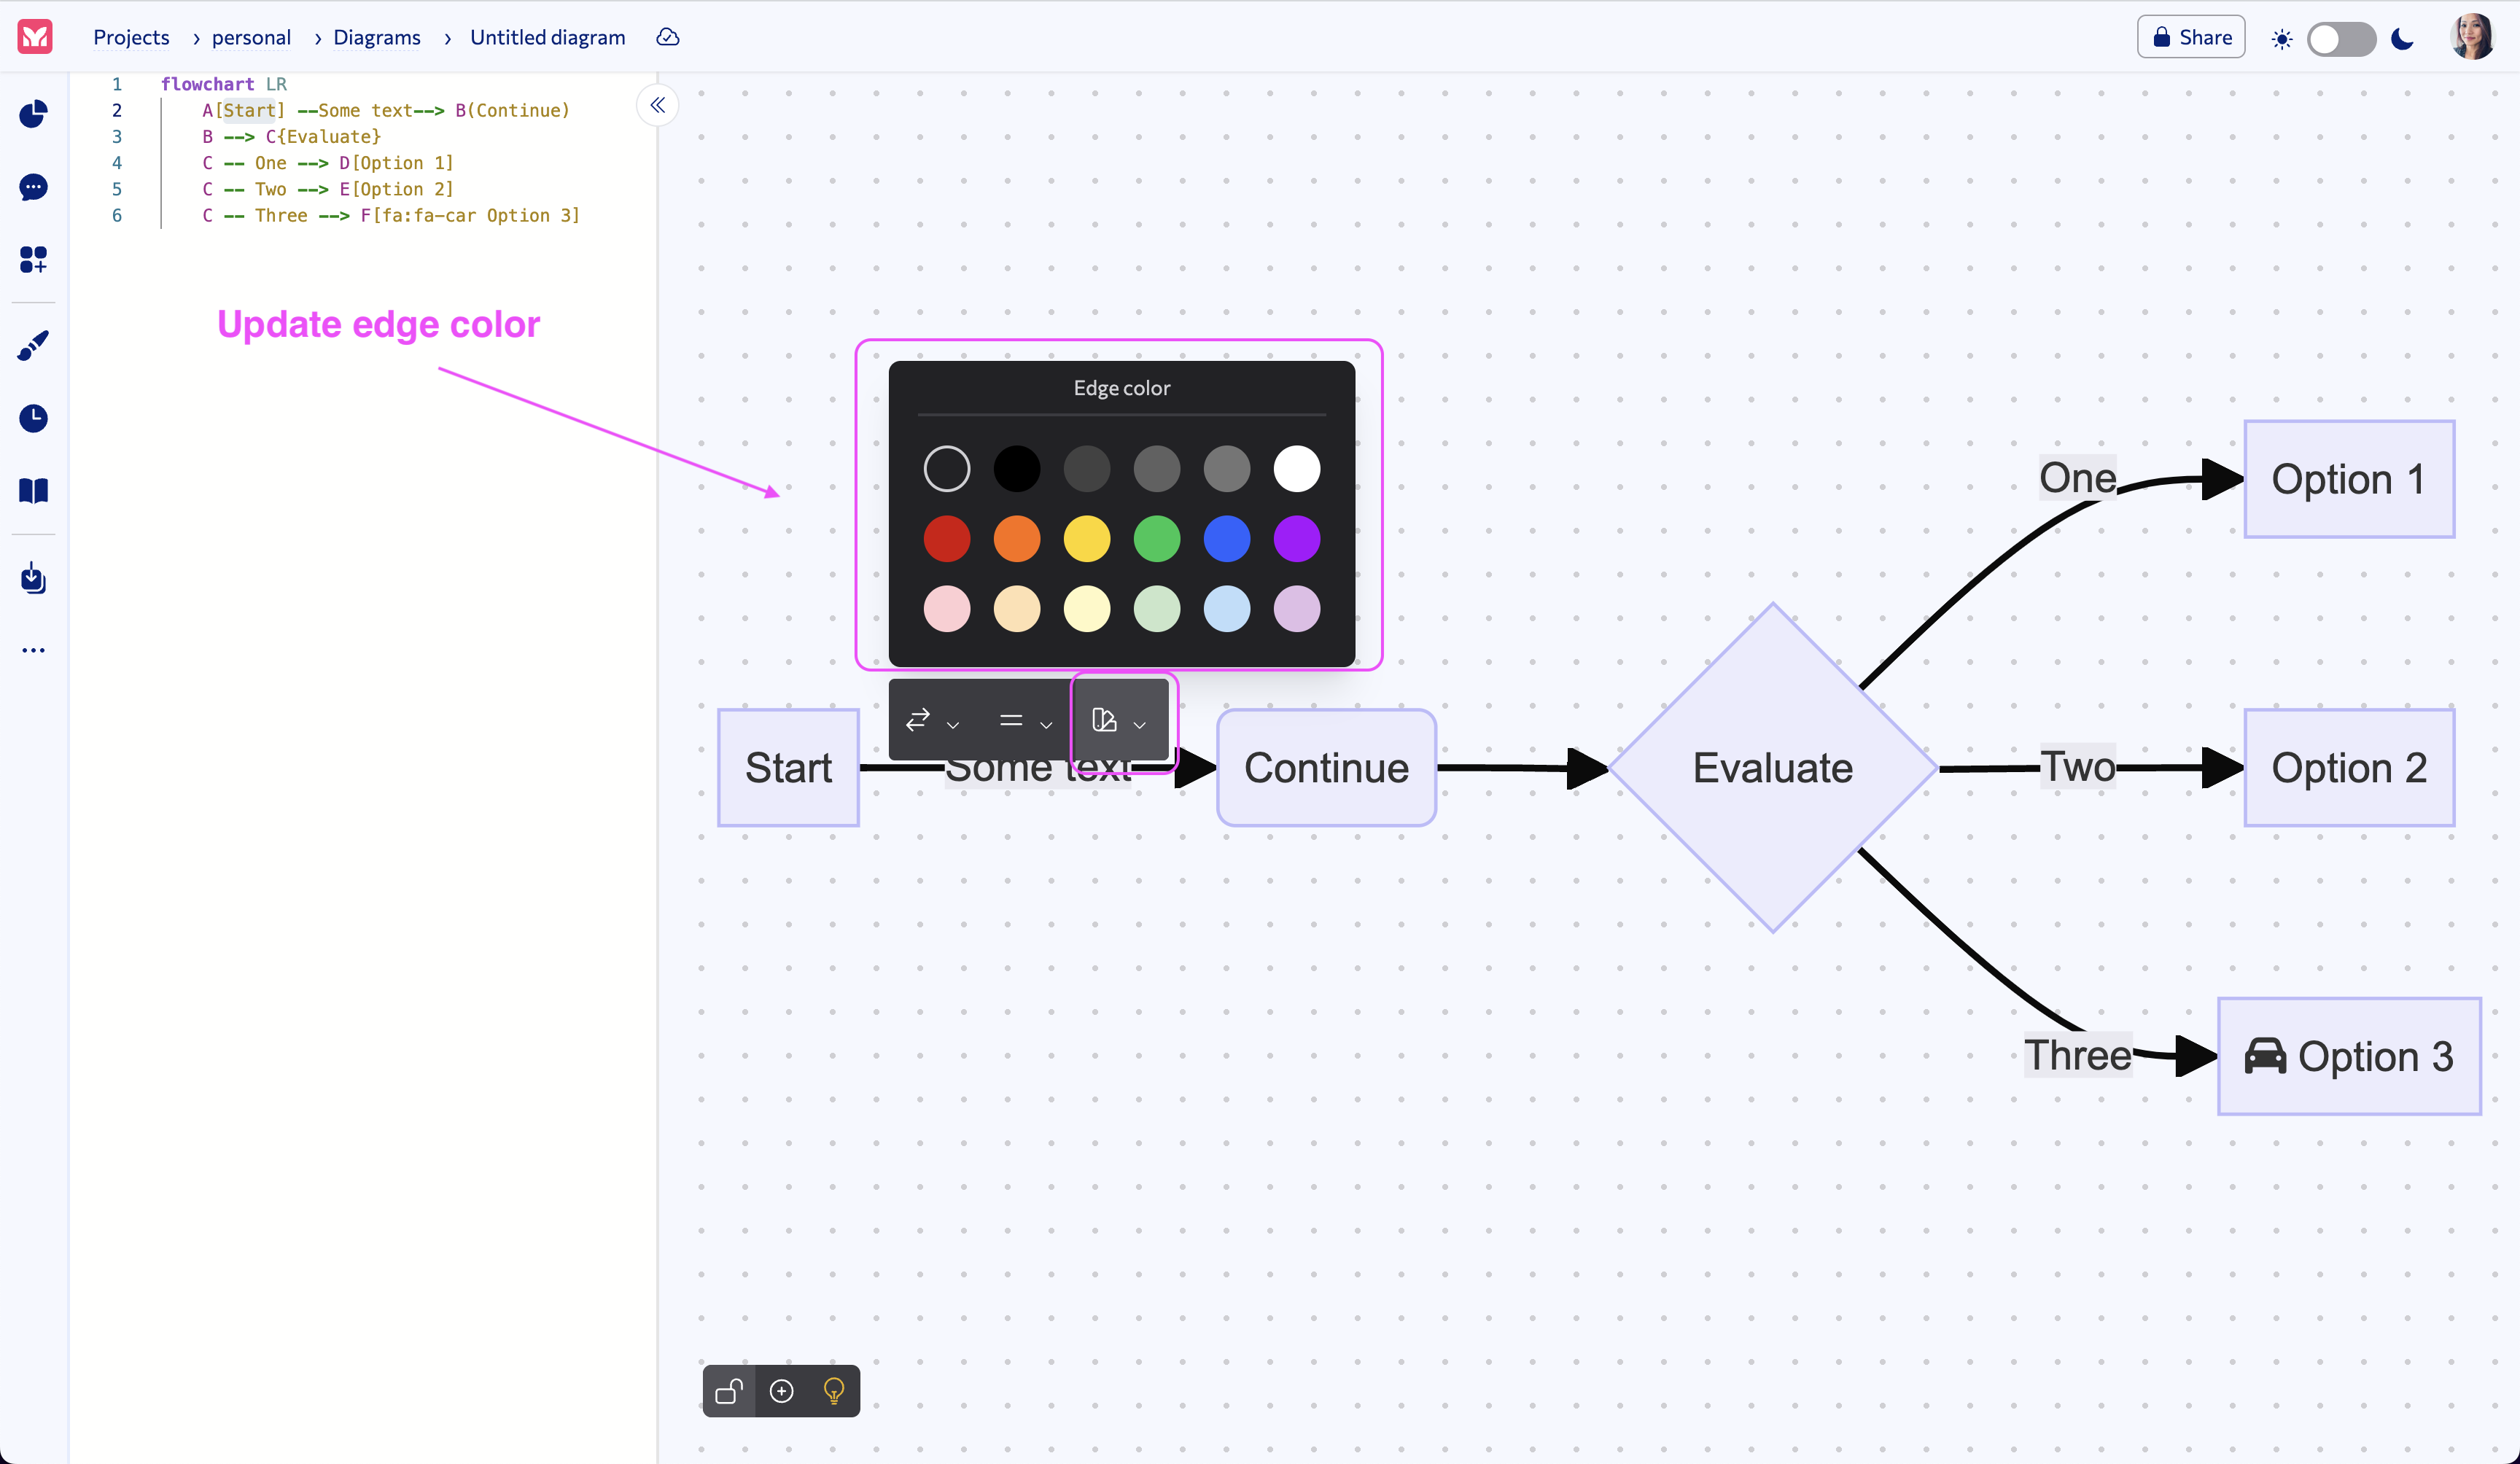
Edit the edge color
To edit the edge color, click on the third icon in the Edge menu to bring up the Color panel.
From the Color panel, you can select the color you want to use for your edge.
Screenshot for editing an edge color:
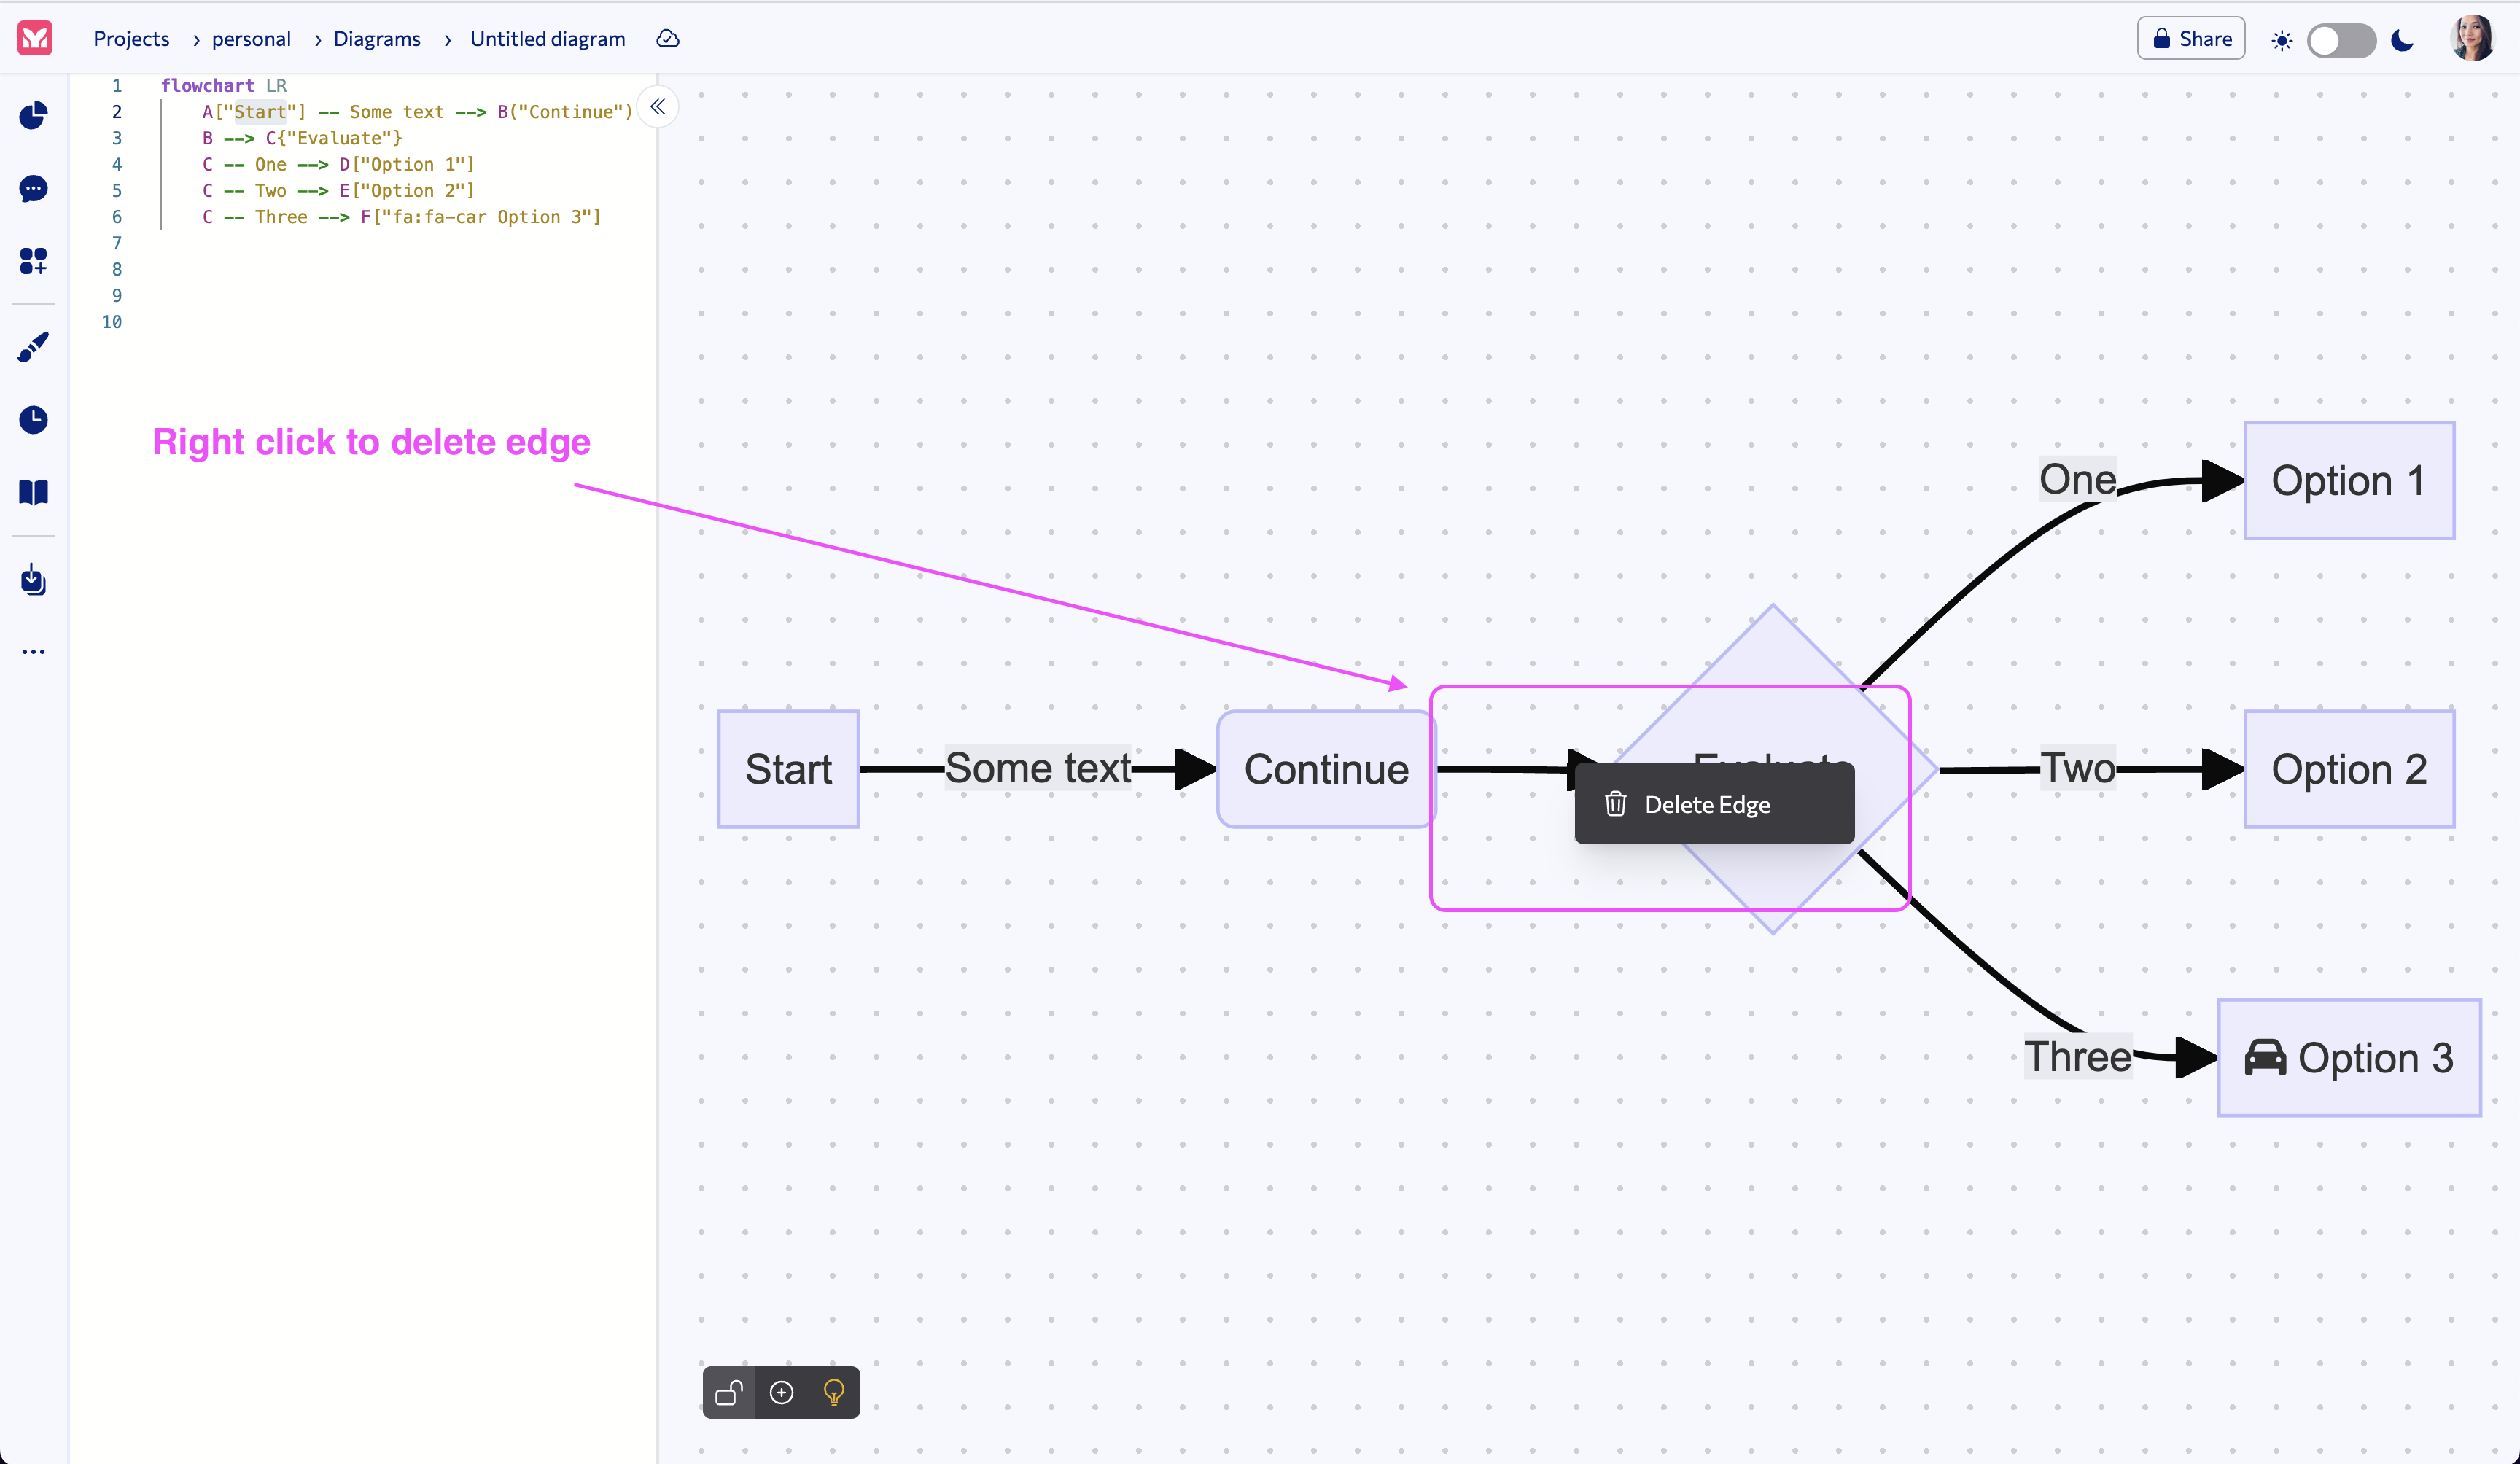
Delete Edge
To delete an edge, right-click on the edge, and click on the “Delete Edge” option.
Screenshot for deleting an edge:
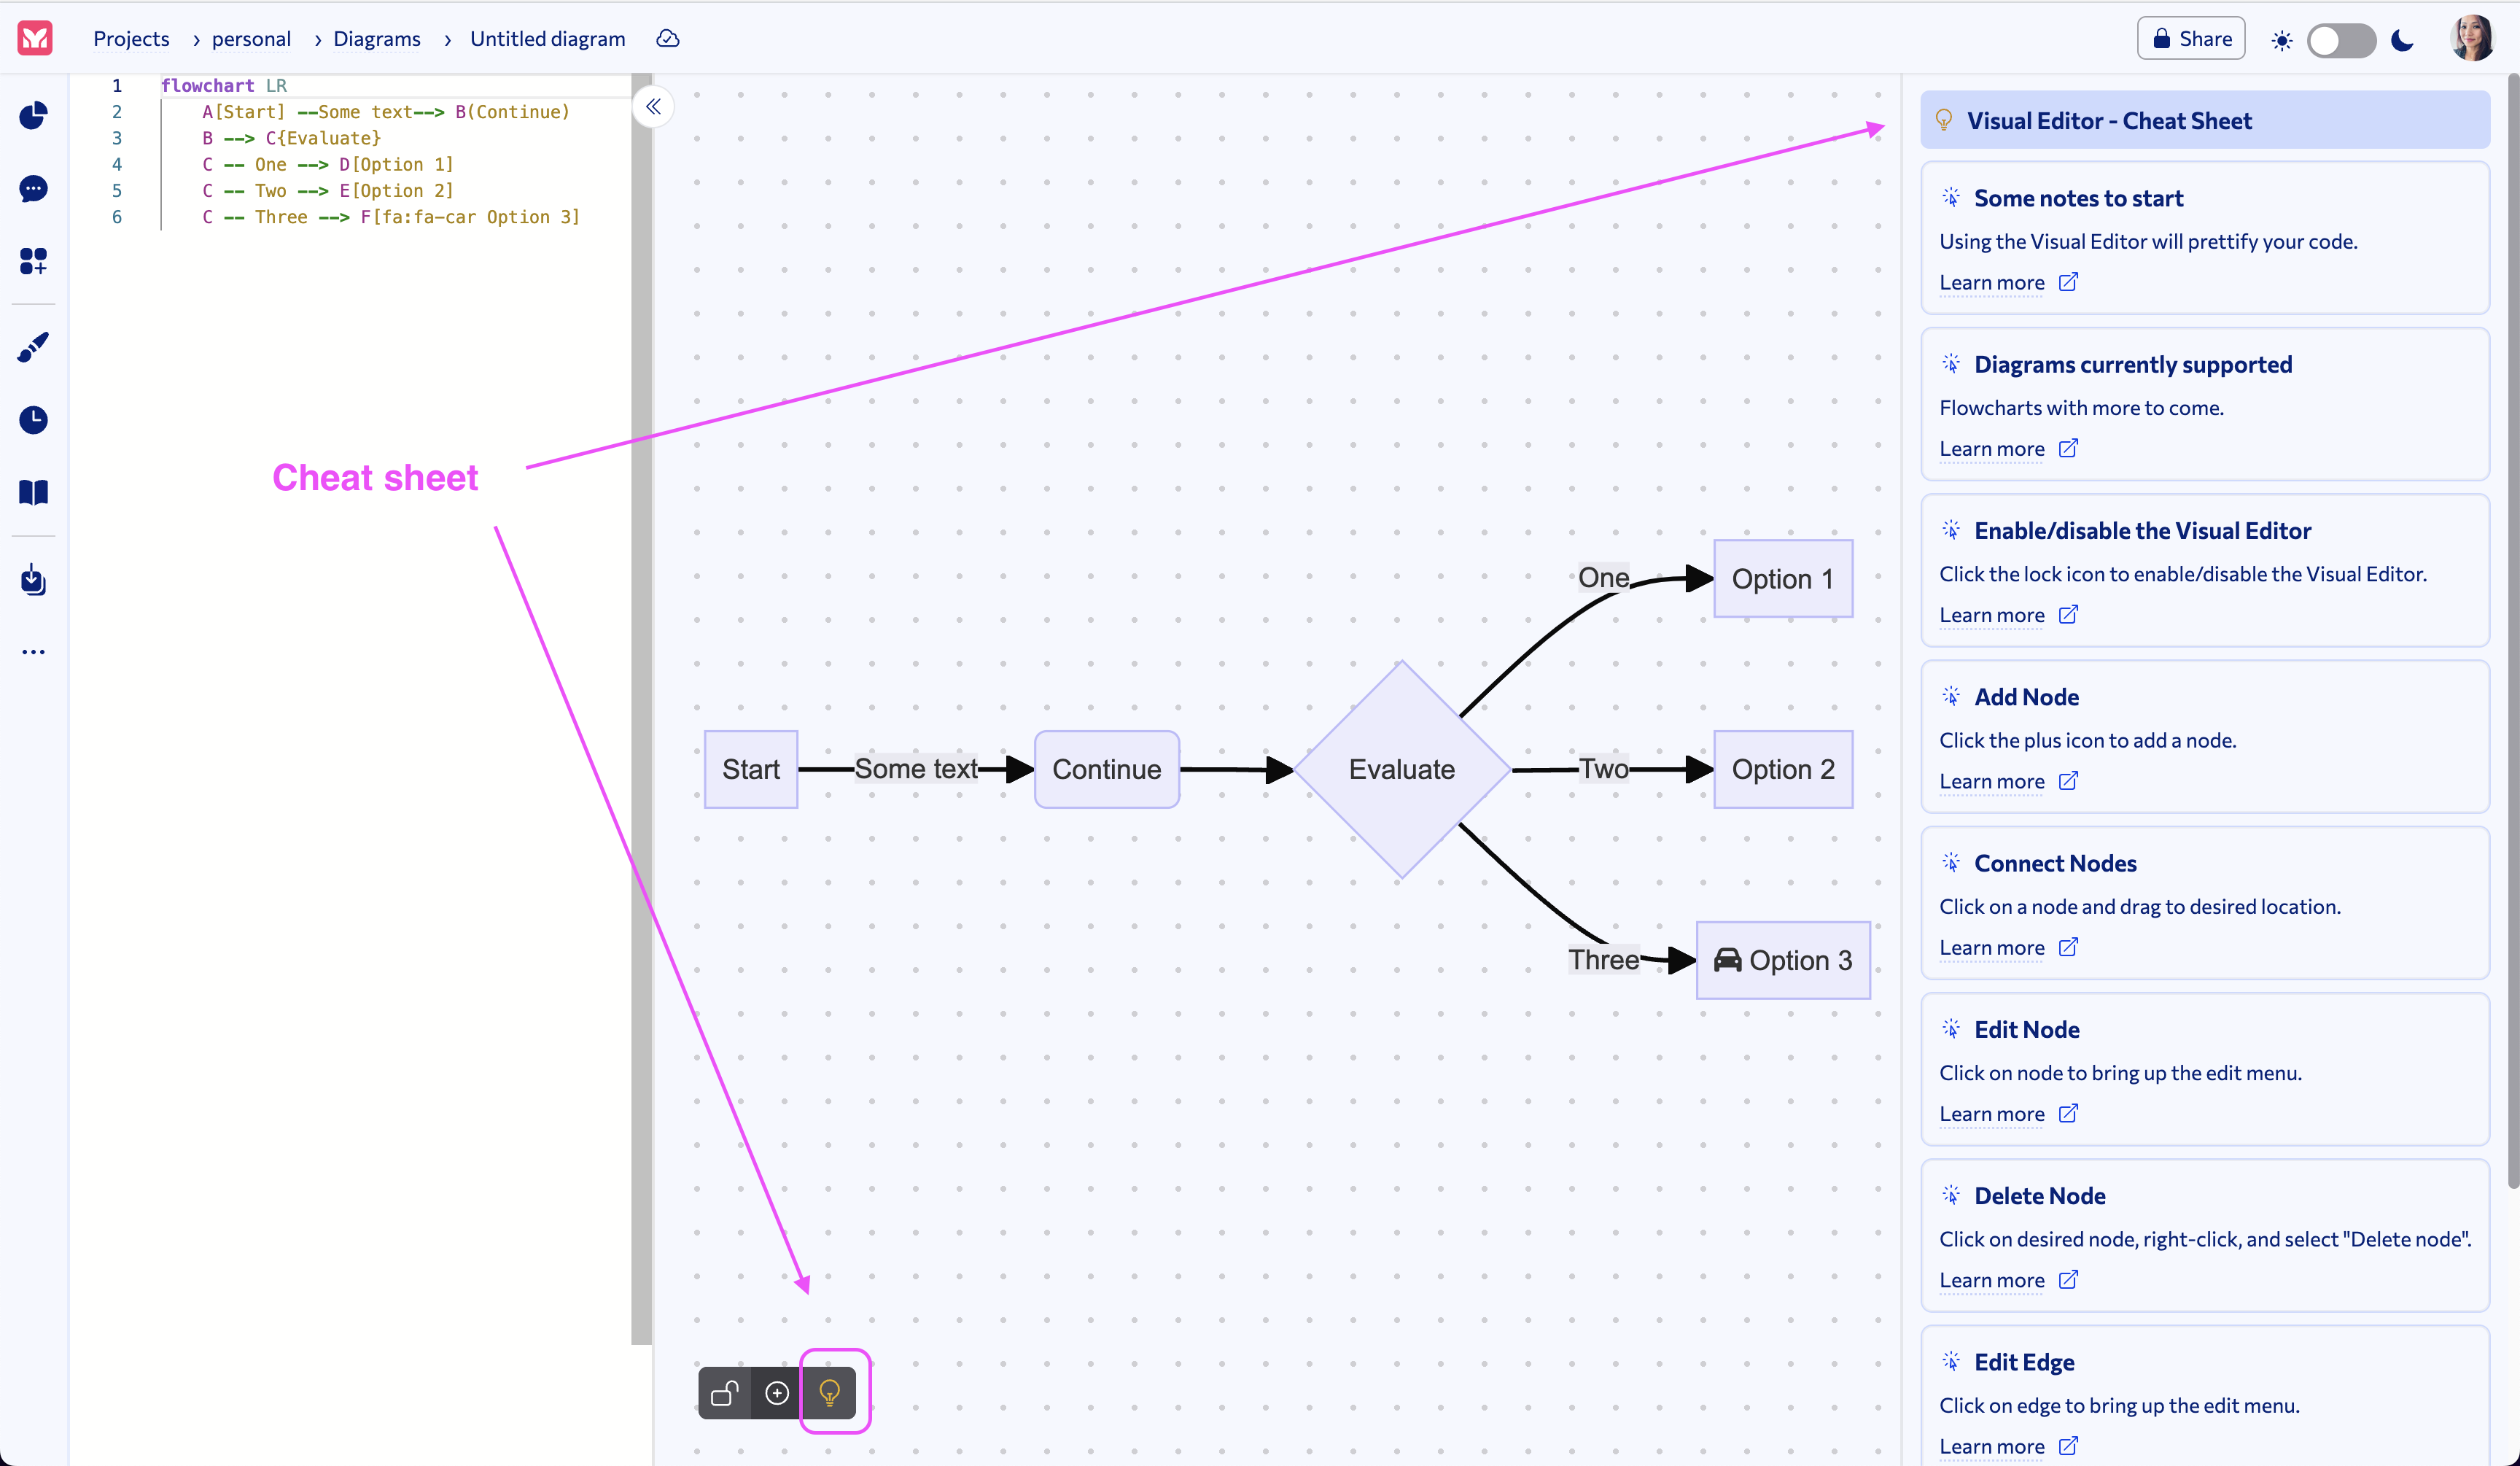
Cheat Sheet
To view the Cheat Sheet, click on the Lightbulb icon (third icon) of the Visual Editor menu.
The Cheat Sheet will open to the right of the Visual Editor.
The Cheat Sheet contains a list of cards with a topic, description, and a link to the respective section in the docs-site page.
Screenshot for cheat sheet:
Demo video
To view the demo video, please visit our YouTube page.