Presentation
This page contains information about Mermaid Chart’s Presentation feature.
About
The Presentation feature allows you to create and present slideshows using Markdown syntax. You can easily add diagrams, images, and text to your slides, making it a powerful tool for creating engaging presentations.
Learn Markdown syntax
Markdown is a lightweight markup language that allows you to format text using simple syntax. It is widely used for creating documentation, notes, and presentations.
For more information on Markdown syntax, check out the Markdown Guide site.
Presentation Editor
Creating slides using Markdown (left panel)
You can write and structure your entire presentation using Markdown in the editor.
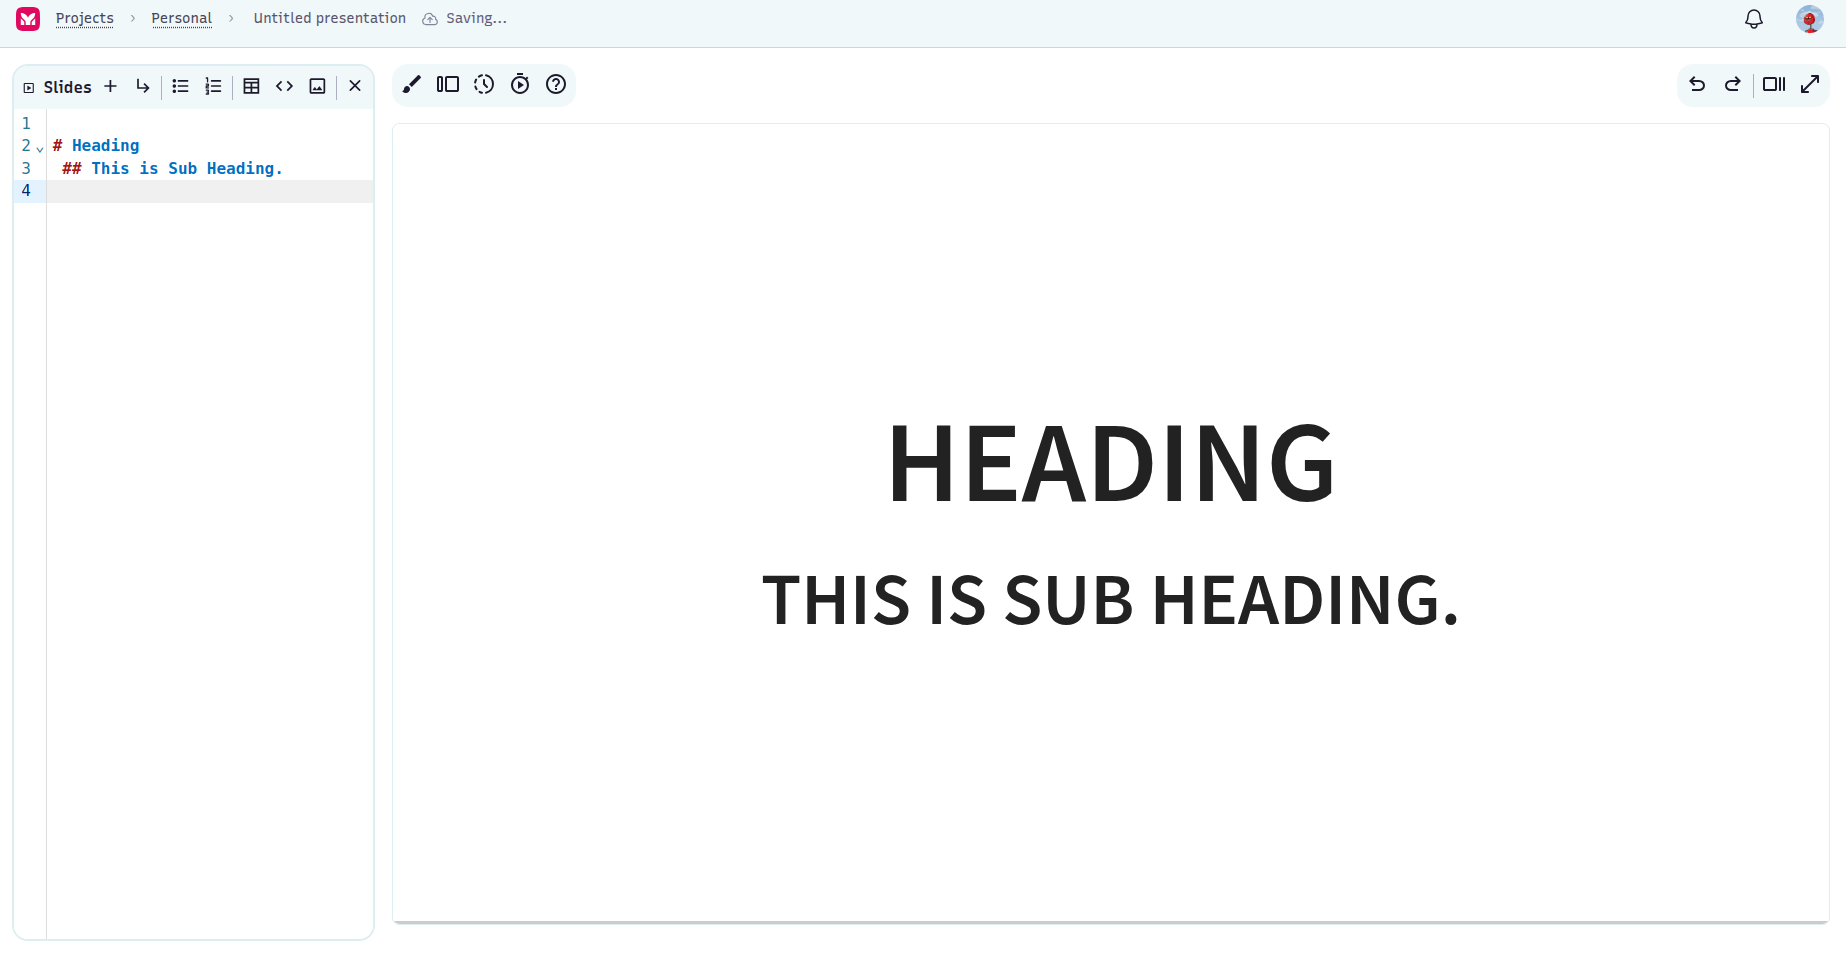
To create a new slide, add four dashes (----) on a new line. This will create a horizontal slide. You can also add a title and subtitle to each slide using the # and ## symbols, respectively.
It is not necessary to add four dashes at the top of the first slide. The first slide will be created automatically when you start adding content. You can add as many slides as you want by repeating the process. Each slide will be separated by four dashes.
Make sure you add a blank line before and after the dashes to ensure proper formatting.
For example:
# Slide 1 Title
## Slide 1 Subtitle

----

# Slide 2 Title
## Slide 2 Subtitle
Supported elements
Slide titles
# Title– Creates a new main slide with a large heading.## Subtitle– Adds a subheading on the same slide.
Heading levels are defined by the number of # symbols used. The more # symbols, the smaller the heading. Heading levels up to six are supported.
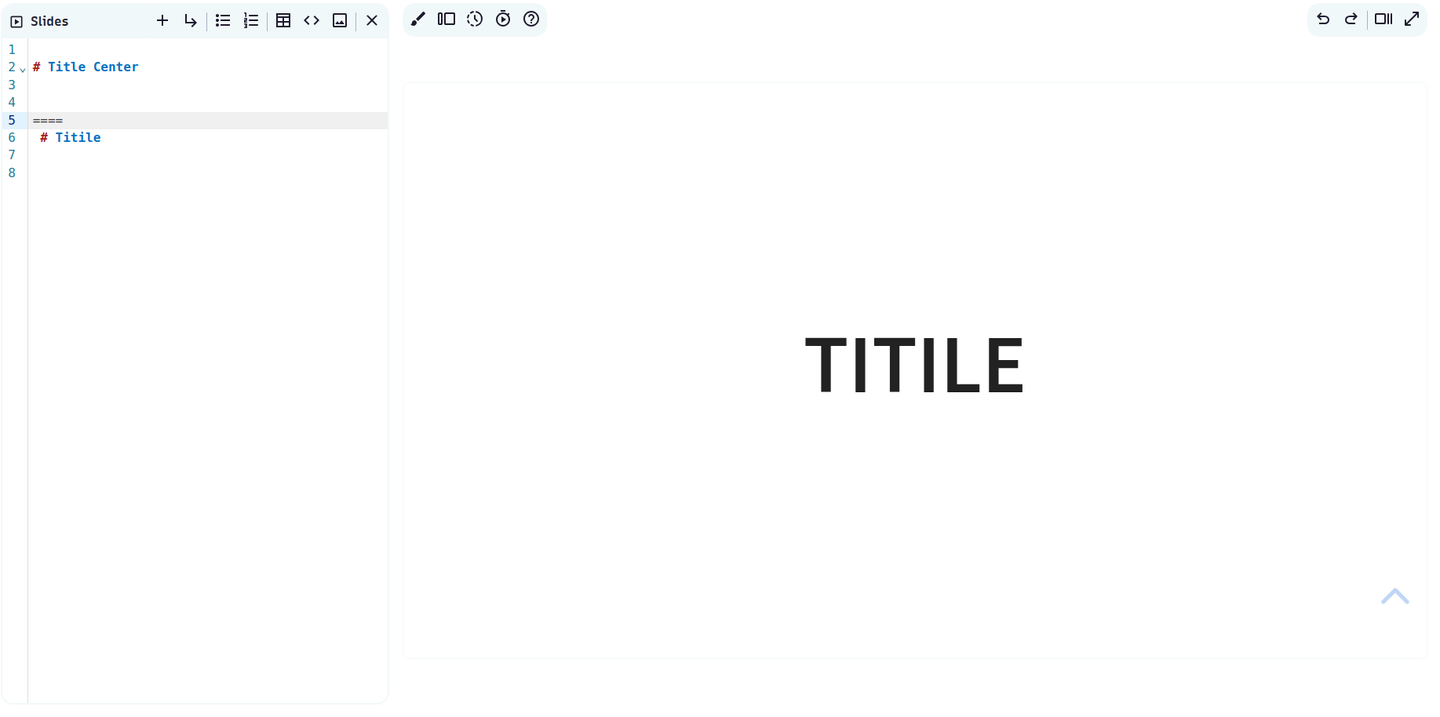
Vertical Slides (nested slides)
The slides are stepped between horizontally by default. These horizontal slides are considered the main, or top-level, slides in your deck.
It’s also possible to nest multiple slides within a single top-level slide to create a vertical stack. This is a great way to logically group content in your presentation and makes it convenient to include optional slides.
To create a vertical slide within a parent slide:
====Splits vertical slides within a slides.
# Horizontal Slide 1

----

# Horizontal Slide 2

====

# Vertical Slide 1 Title

====

# Vertical Slide 2 Title

----

# Horizontal Slide 3
Bulleted lists
- Point one
- Point two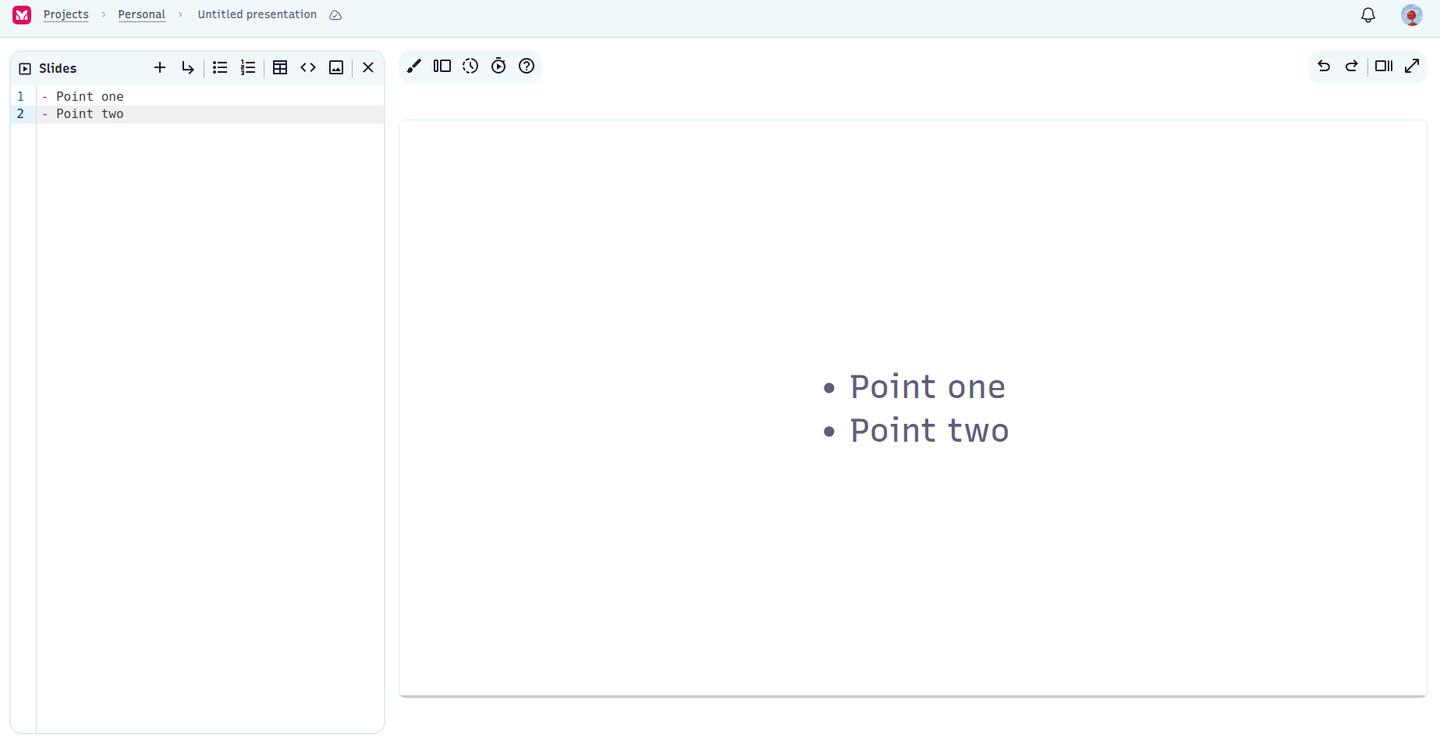
Numbered lists
1. First step
2. Second step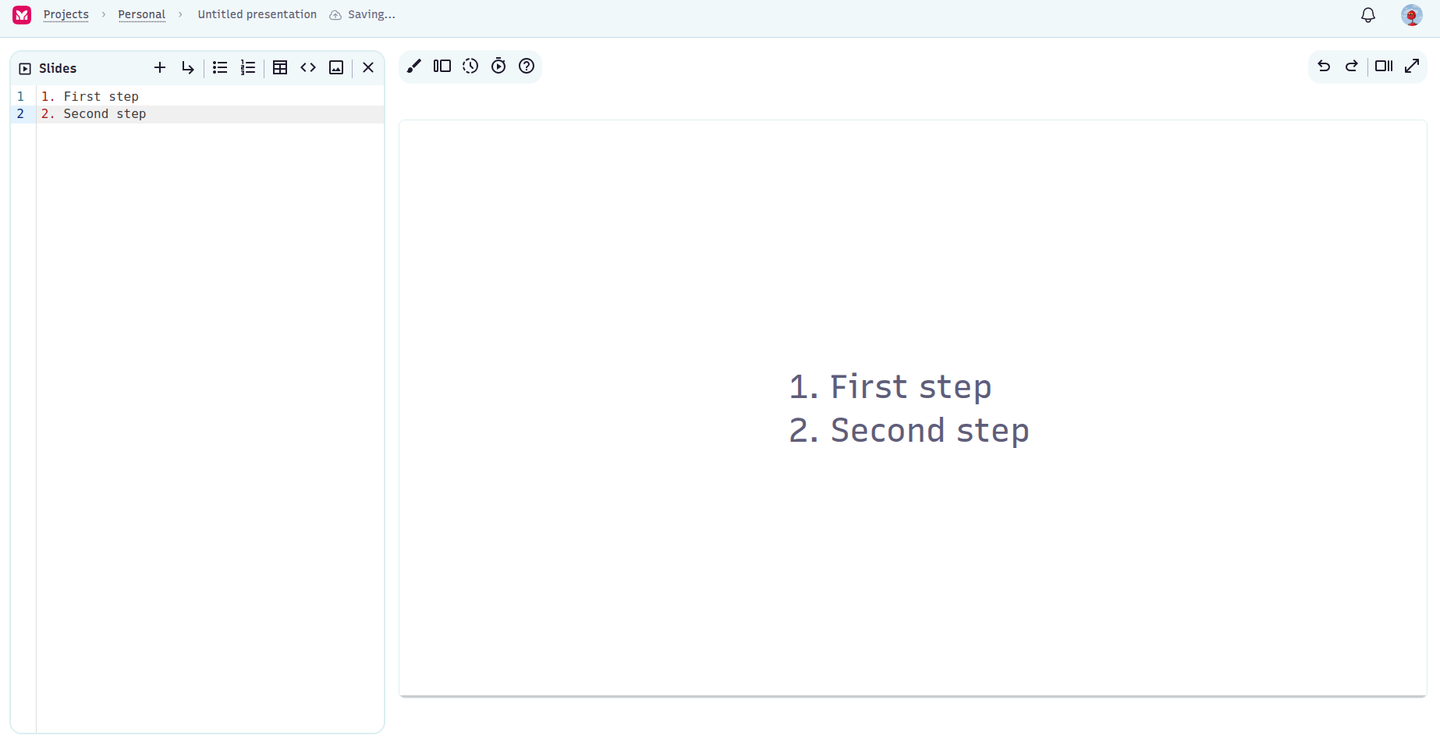
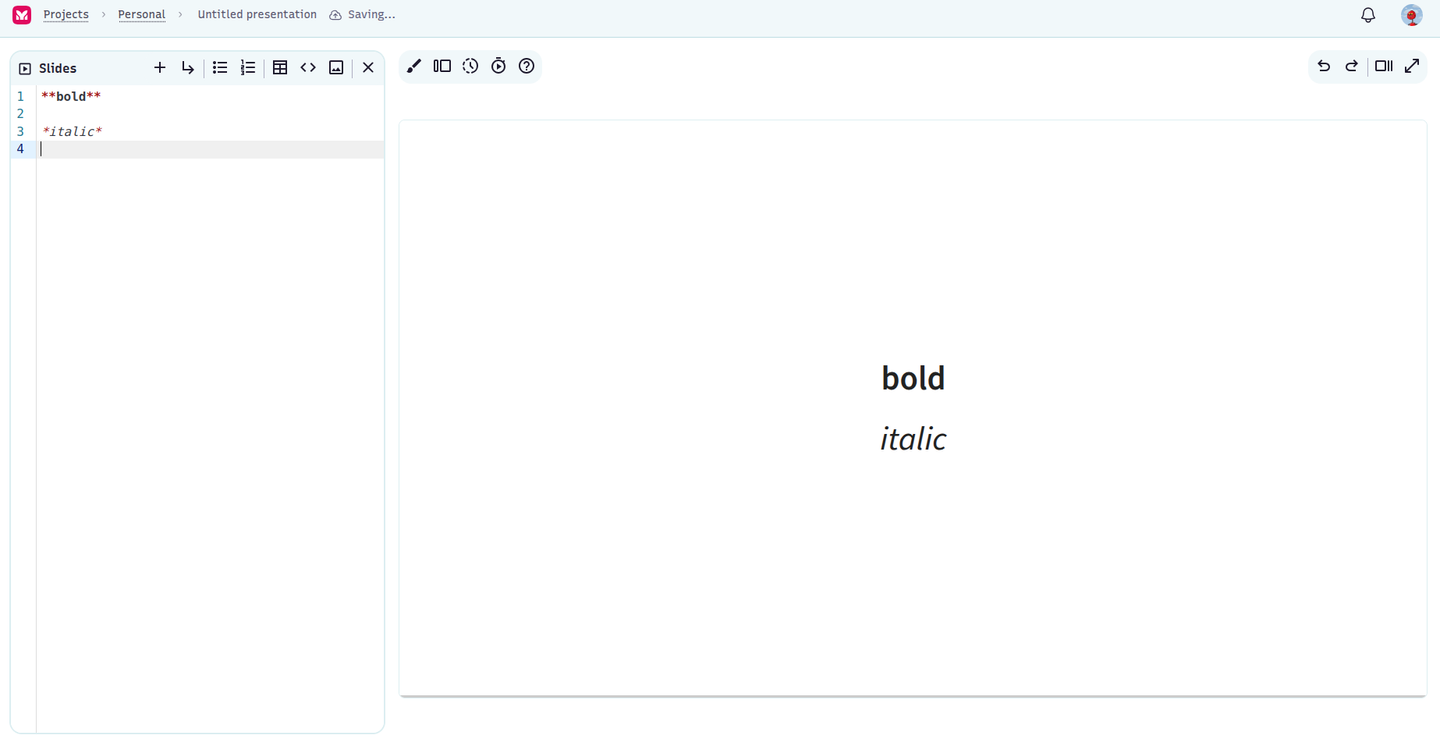
Text Formatting
- `**bold**` – Bold text
- `_italic_` – Italic text
Embedding Images
::img{src="https://example.com/image.png"}

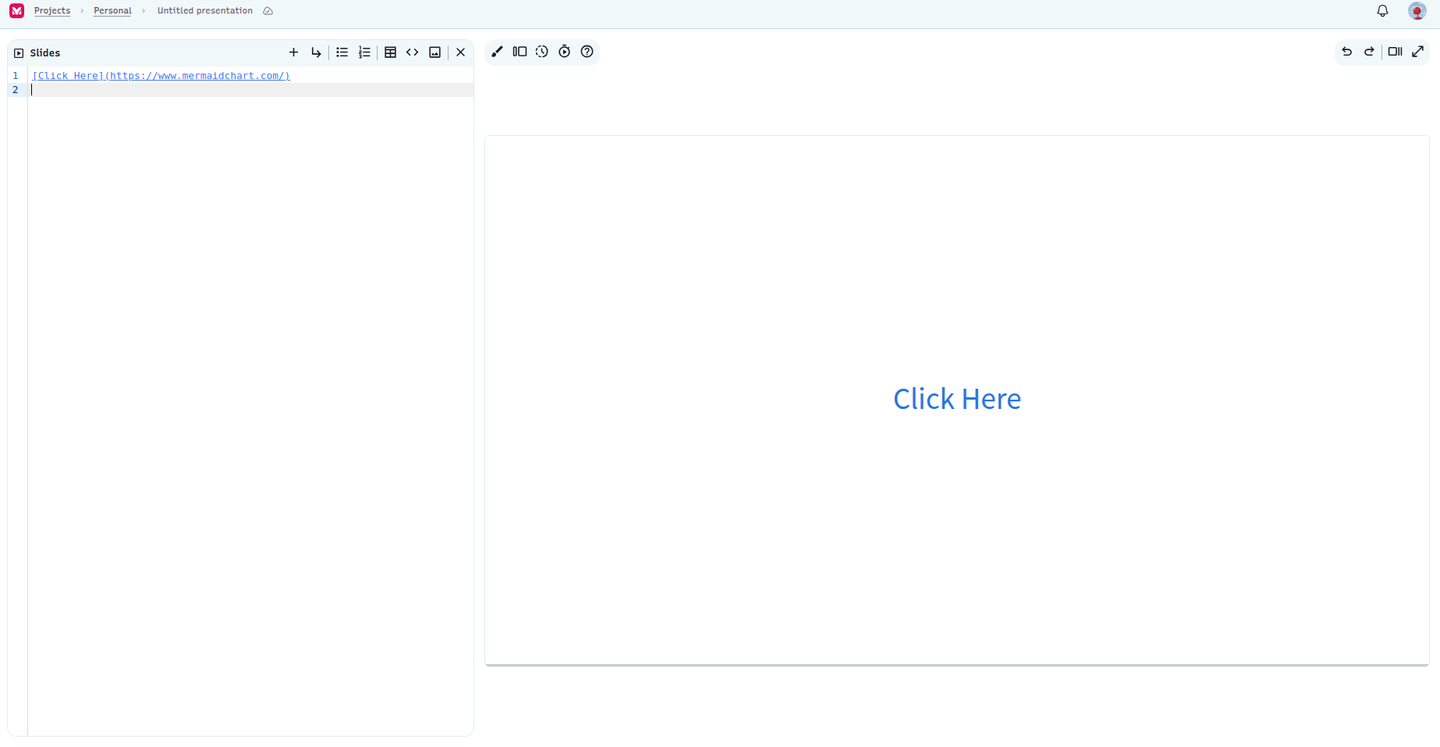
Adding Links
[Click Here](https://your-link.com)
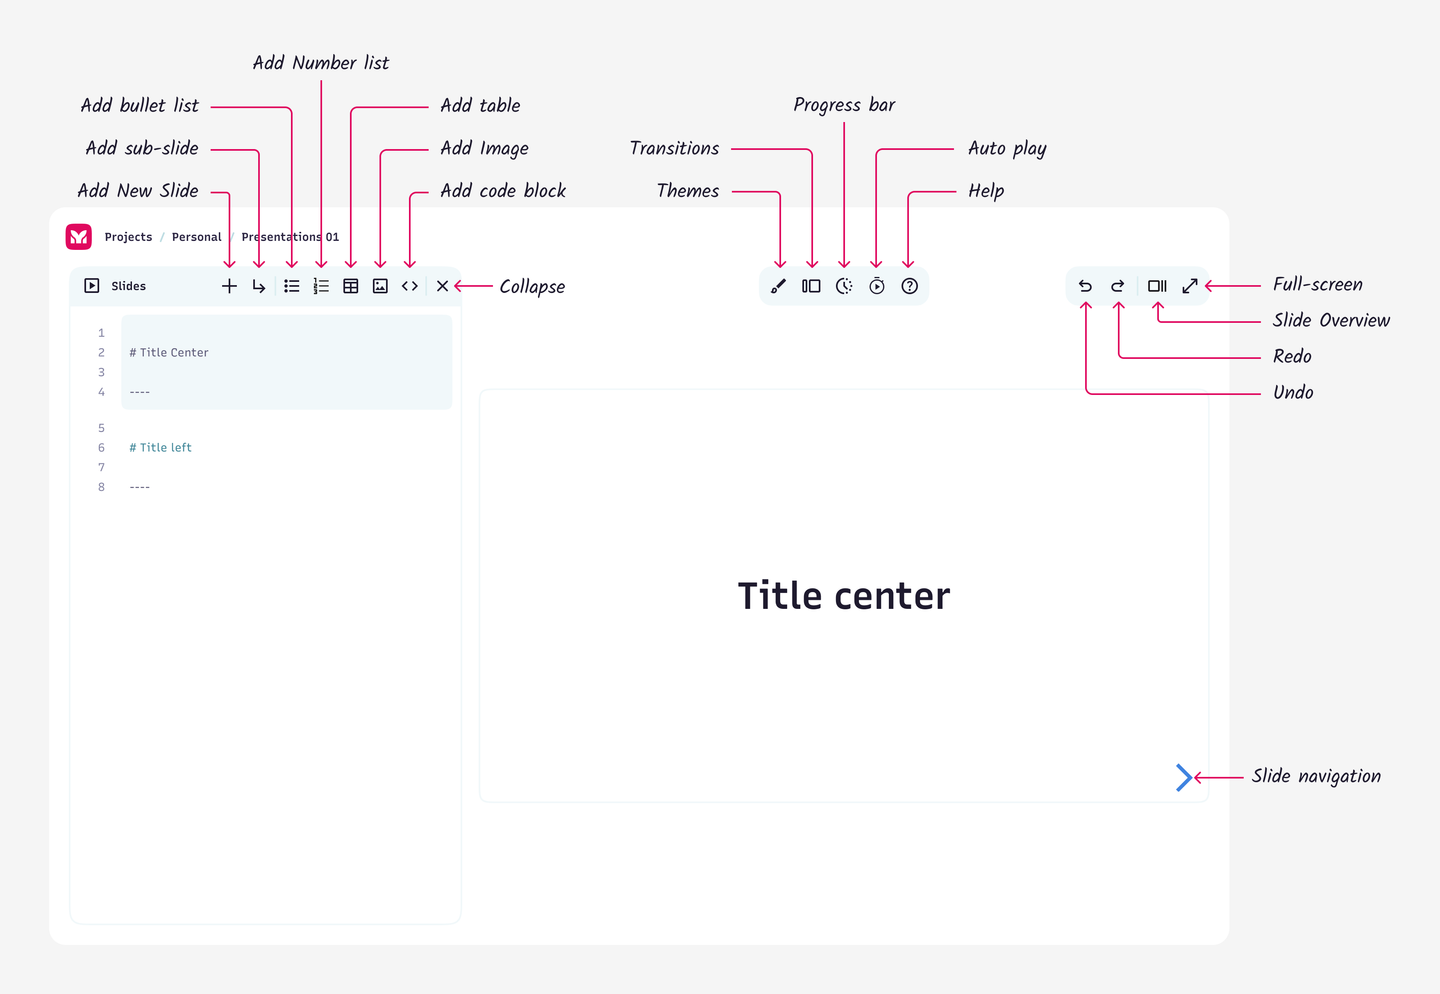
Main toolbar (top-left corner)
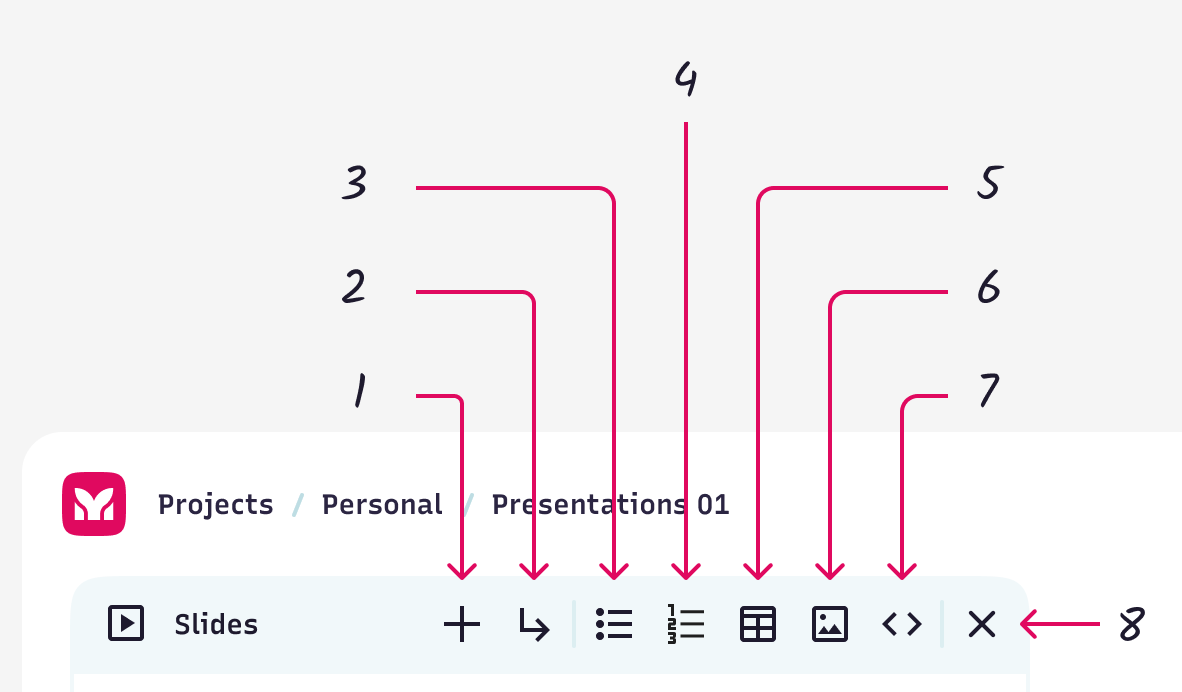
| Numbers | Function | Description |
|---|---|---|
| 1 | Add New Slide | Inserts a new slide at the current cursor location. |
| 2 | Add Sub-Slide | Creates a sub-slide underneath the selected slide. |
| 3 | Add Bullet List | Adds a bullet list starter at the cursor. Great for summarizing points. |
| 4 | Add Number List | Inserts a numbered list for creating ordered steps or sequences. |
| 5 | Add Table | Inserts a basic Markdown table structure. |
| 6 | Add Image | Insert image markdown. |
| 7 | Add Code Block | Inserts a code block perfect for displaying programming code. |
| 8 | Close | Collapse Markdown editor. |
Adding a new slide
The Add New Slide action in the toolbar opens a predefined slide layout selector. These templates help you quickly structure your presentation using standard markdown, enhanced with Mermaid-compatible syntax.
Available Slide Layouts
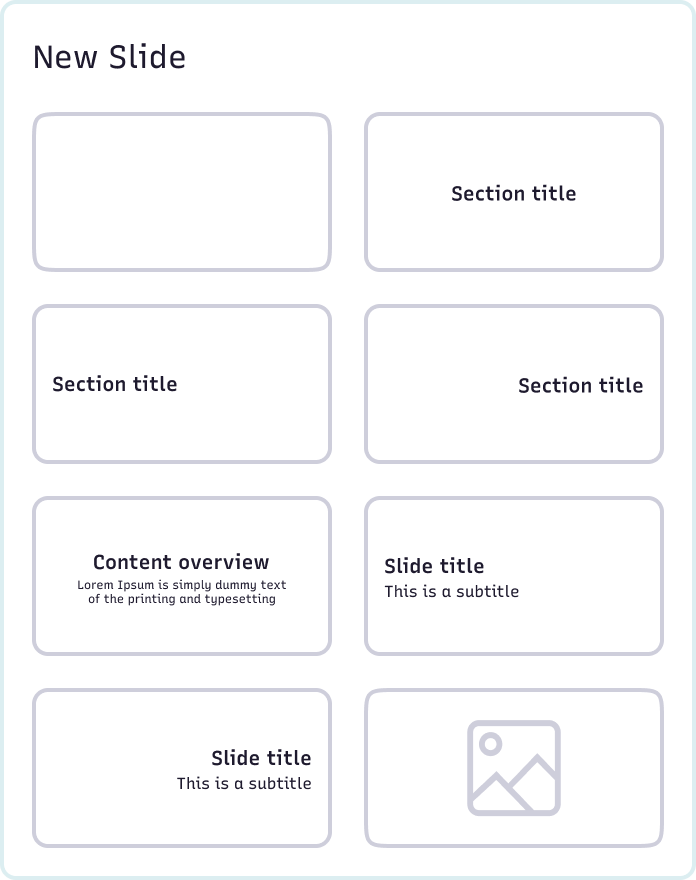
You can add these templates in the markdown editor to start customizing them.
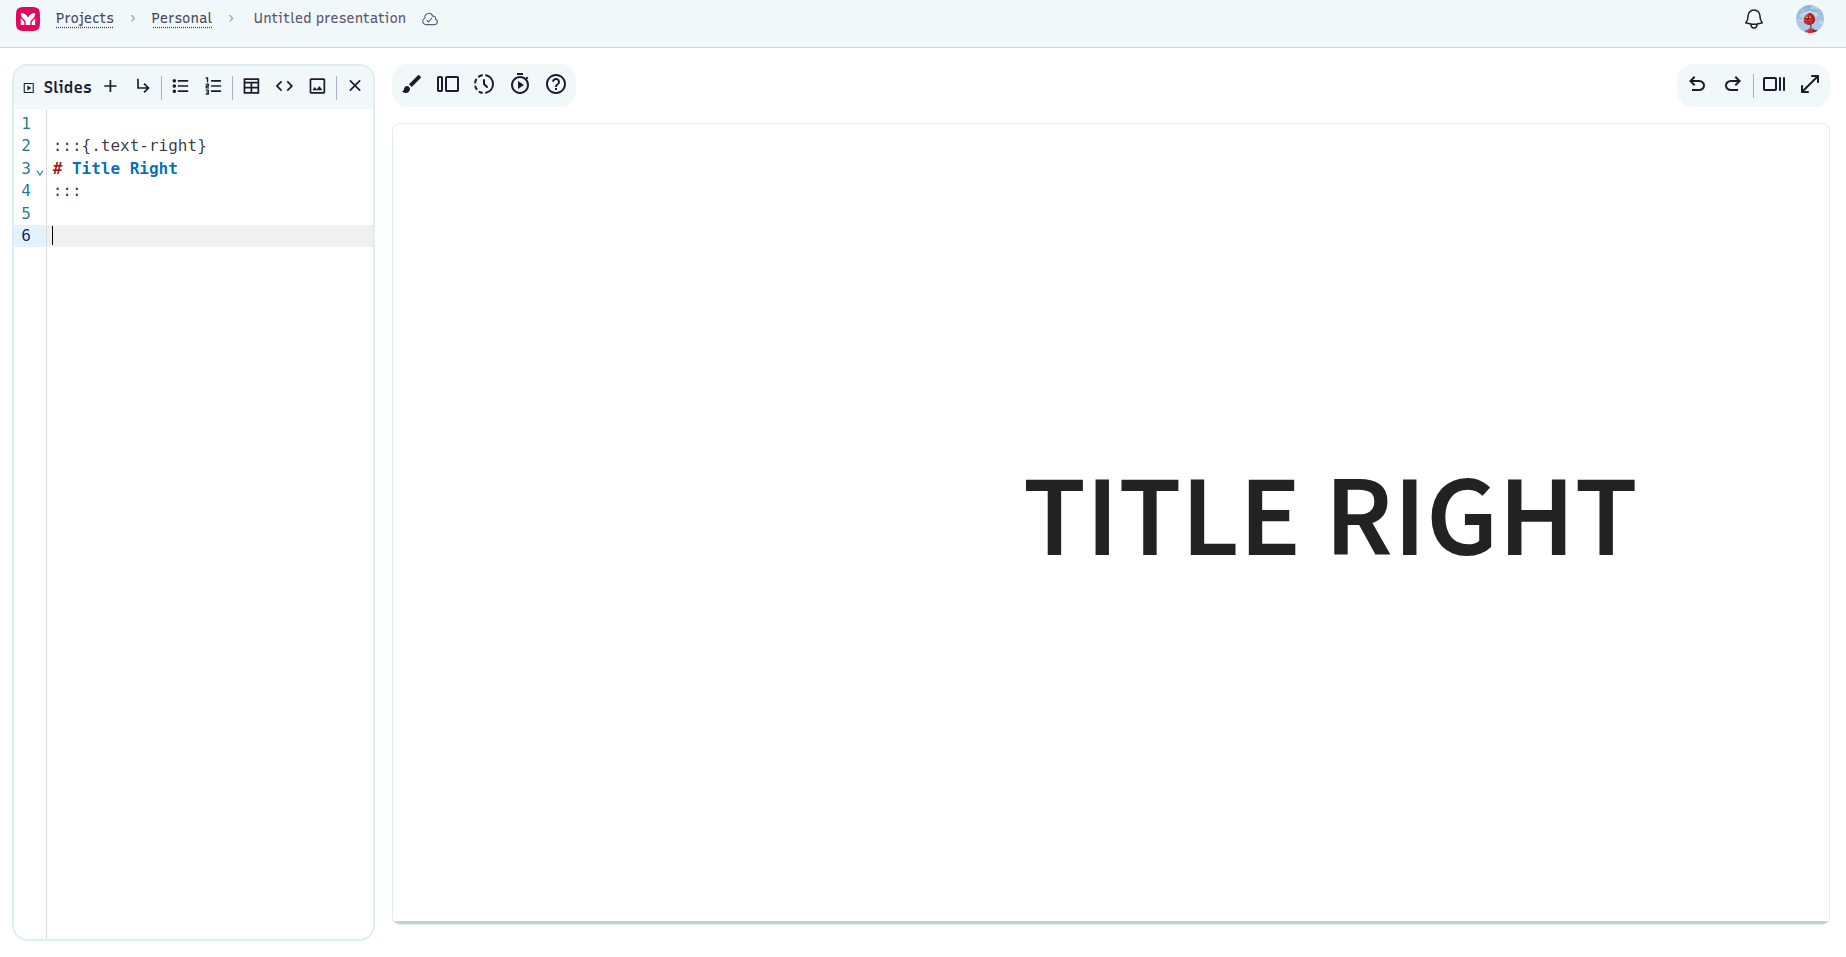
Example: Slide with Text Aligned Right
If you choose a right-aligned title layout, the following markdown block will be inserted:
:::{.text-right}

# Title Right

:::
Insert Image
There are two ways to add images to your slides:
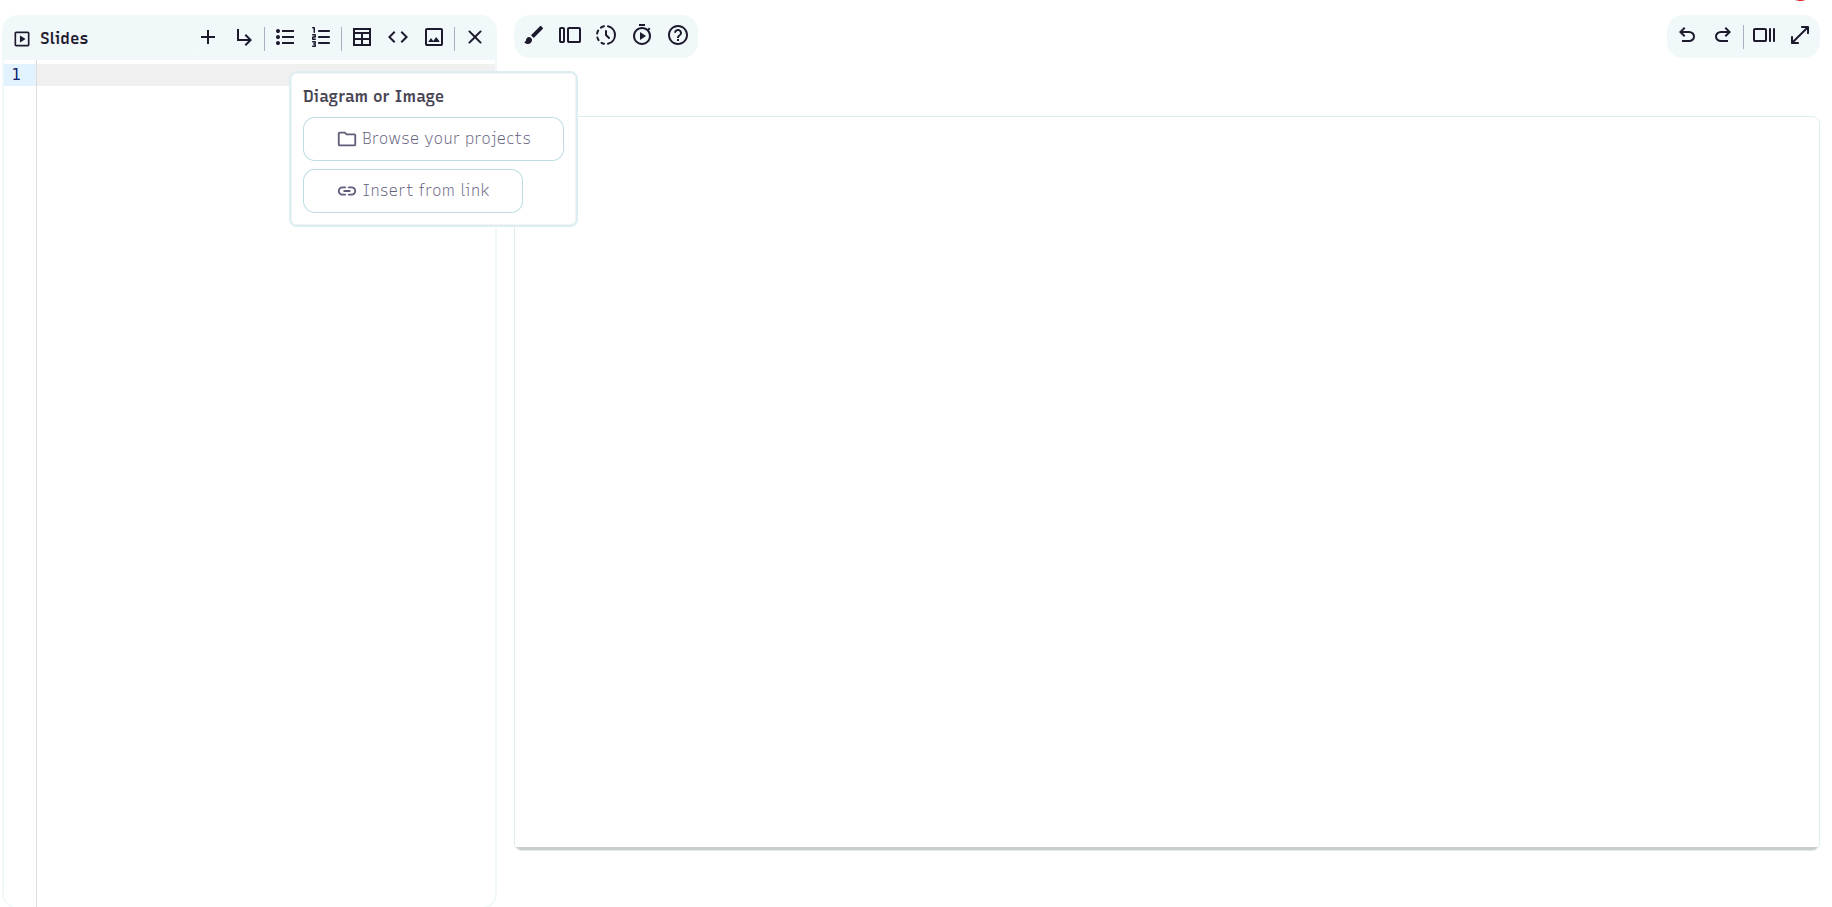
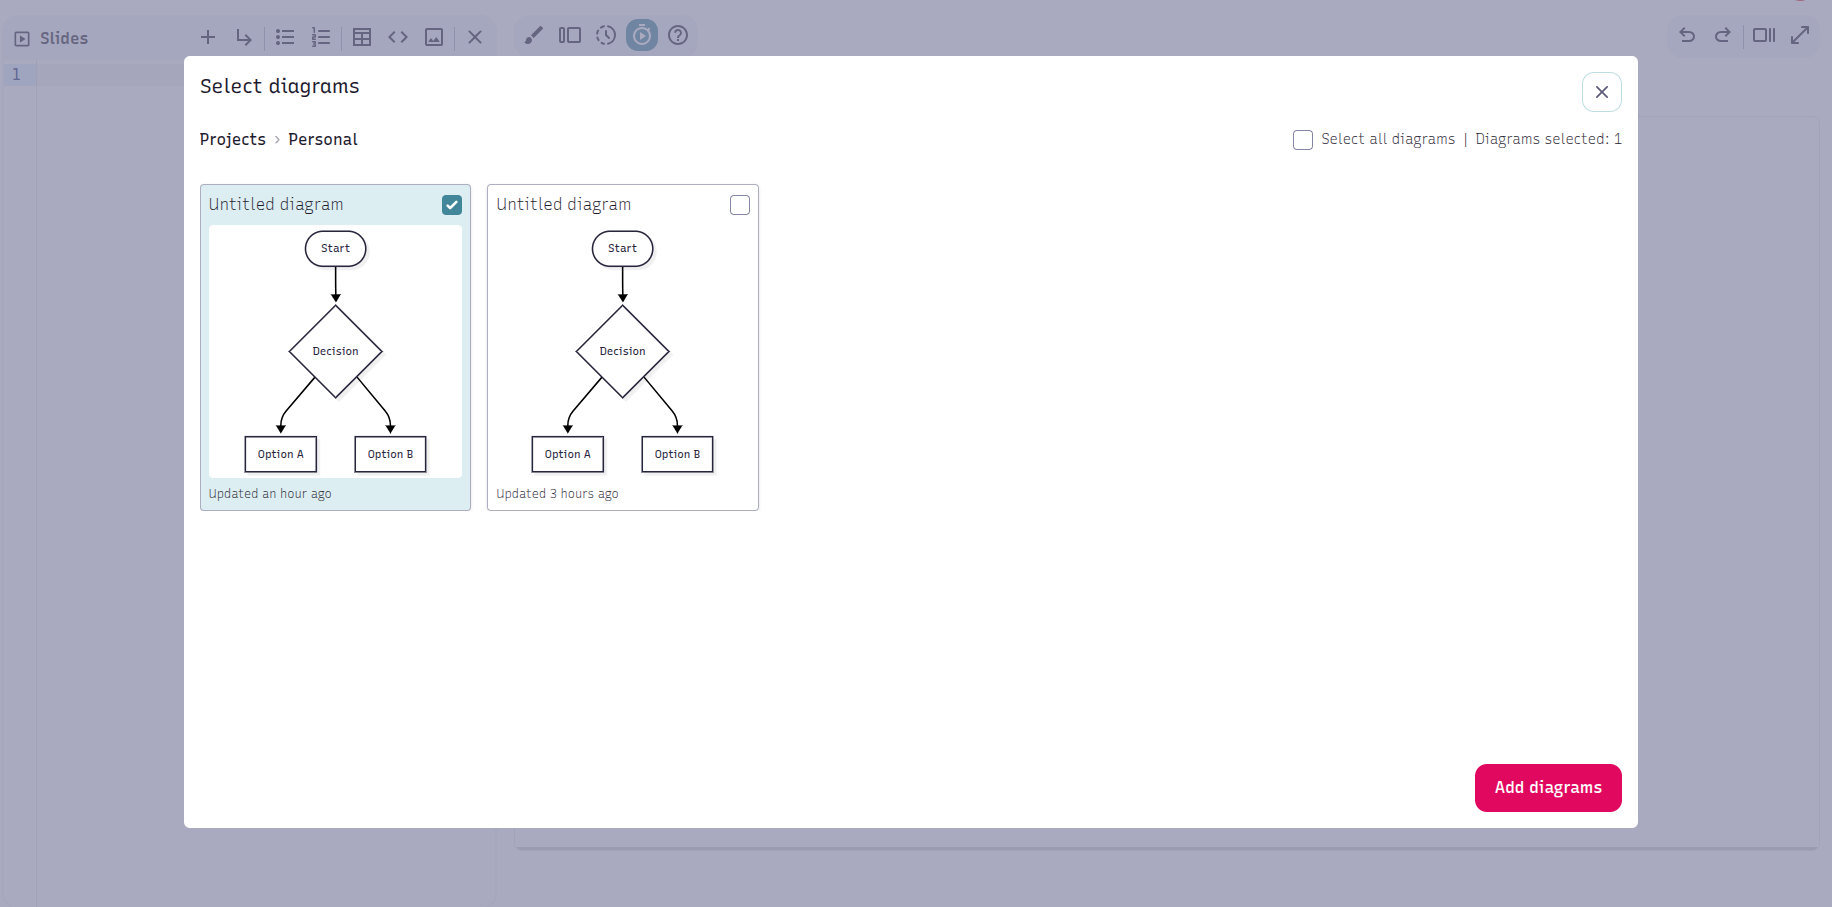
1. Browse your projects
Choose from the diagrams you’ve already created.
2. Insert from link
Add an image using a direct hyperlink (URL).
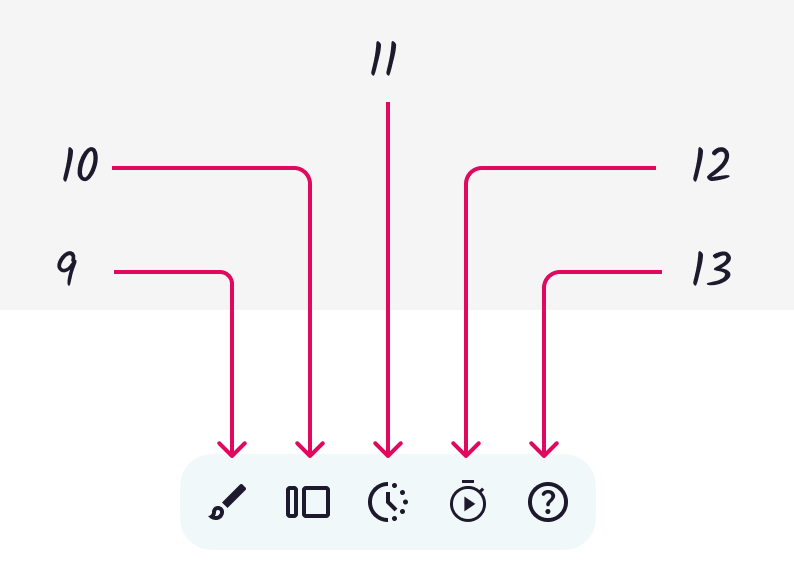
Presentation Toolbar (top-center)
Customize how your presentation looks and behaves:
| Numbers | Function | Description |
|---|---|---|
| 9 | Themes | Choose a predefined Reveal.js theme (e.g., black, white, moon, night). Affects slide styling. |
| 10 | Transitions | Select how slides animate between each other: fade, slide, zoom, etc. |
| 11 | Progress bar | Show or hide the progress bar at the bottom of slides to indicate slide position. |
| 12 | Autoplay | Automatically cycles through slides at timed intervals — great for unattended demos. |
| 13 | Help | Opens this guide so you can reference functionality any time. |
Pan and Zoom toolbar (top-right corner)
These controls help you manage your editing actions and presentation view.
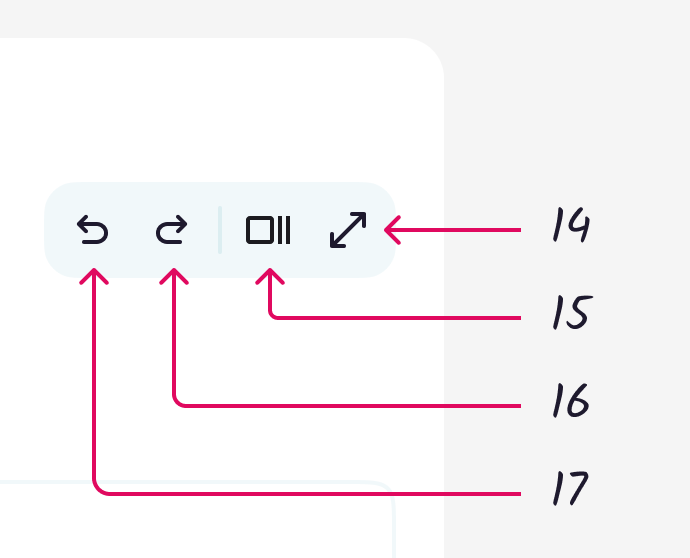
| Number | Action | Description |
|---|---|---|
| 14 | Full Screen | Expands the slide view to full-screen mode for immersive presenting. |
| 15 | Slide Overview | Displays all slides in a zoomed-out overview so you can jump to any slide quickly. |
| 16 | Redo | Re-applies an undone action if you change your mind. |
| 17 | Undo | Reverts the last action you performed. |
Slide Navigation Arrow (Bottom-Right)

- Use this arrow to advance to the next slide during your presentation.
- You can also navigate using your keyboard arrows when in full-screen mode.